A Community discussion forum for Halo Custom Edition, Halo 2 Vista, Portal and Halo Machinima
|
|
»Forums Index
»Halo Custom Edition (Bungie/Gearbox)
»Halo CE General Discussion
» |

|
| Page 25 of 34 | Go to page: · 1 · ... · 22 · 23 · 24 · [25] · 26 · 27 · 28 · ... · 34 · Prev · Next |
| Author | Topic: [App] Adjutant 2 (1188 messages, Page 25 of 34) | ||||
| Moderators: Dennis | |||||
|
jabberwockxeno Joined: Jan 16, 2013 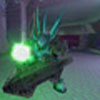
|
Posted: Mar 6, 2013 06:48 PM
Msg. 841 of 1188
Here's where I am with the needler:
 Fixed the needles, plasma arc, and glowing holes. I need to get the lights brighter, for starters. How would I do this? I'm using colored self illumination right now. THe hexagonal pattern is very subtle, almost nonexistent compared to the in game model. I have no idea why. I think there's a reflection map/hdri map/cubemap I'm missing here, because the model is very matte. It's also not as brown as it is in game. Suggestions/help? |
||||
|
|
|||||
|
DarkestSeptagon Joined: Nov 29, 2012 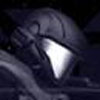
|
Posted: Mar 9, 2013 01:11 AM
Msg. 842 of 1188
Why are Reach's pelican's hull and interior two seperate models? I know it's for technical reasons because it contains a lot of polygons, but in some cutscenes they are both seen together. Is there a campaign map that includes them as one model or do I need to combine them manually?
|
||||
|
|
|||||
|
Gravemind Joined: Jul 28, 2009 
The Age of Reclamation has begun. |
Posted: Mar 9, 2013 01:20 AM
Msg. 843 of 1188
The hull and interior are probably attached in-game using scripts such as the object_attach function in CE. If you want them as one model, you'll need to combine them manually.
|
||||
|
|
|||||
|
DarkestSeptagon Joined: Nov 29, 2012
|
Posted: Mar 9, 2013 02:15 AM
Msg. 844 of 1188
Quote: --- Original message by: Gravemind Okay thanks!The hull and interior are probably attached in-game using scripts such as the object_attach function in CE. If you want them as one model, you'll need to combine them manually. |
||||
|
|
|||||
|
ElijahB1 Joined: Nov 25, 2012 
|
Posted: Mar 9, 2013 06:51 PM
Msg. 845 of 1188
Quote: --- Original message by: DarkestSeptagon Why are Reach's pelican's hull and interior two seperate models? I know it's for technical reasons because it contains a lot of polygons, but in some cutscenes they are both seen together. Is there a campaign map that includes them as one model or do I need to combine them manually? Just extract both and then merge the insides with the hull |
||||
|
|
|||||
|
jackrabbit Joined: Apr 27, 2005 
Fight Against the Machine of Deth! |
Posted: Mar 9, 2013 09:14 PM
Msg. 846 of 1188
is it possible to extract the bsp of a map to model format for use in 3dsmax?
|
||||
|
|
|||||
|
killzone64 Joined: Jun 9, 2010 
sometimes i miss the chaos occasionally |
Posted: Mar 9, 2013 09:29 PM
Msg. 847 of 1188
it probably is but we are not able to do so yet.
|
||||
|
|
|||||
|
DarkestSeptagon Joined: Nov 29, 2012
|
Posted: Mar 10, 2013 01:06 AM
Msg. 848 of 1188
Thanks, atleast it was easy.
 Edited by DarkestSeptagon on Mar 10, 2013 at 01:06 AM |
||||
|
|
|||||
|
jabberwockxeno Joined: Jan 16, 2013
|
Posted: Mar 11, 2013 08:16 AM
Msg. 849 of 1188
Quote: --- Original message by: waffles ^ The way you see it in Reach is due to extensive material setups within the engine itself. The cubemap is not a static single cubemap, I dare to say that reach almost entirely scrapped using static cubemaps for per bsp section cubemaps, locate the Levels directory for the map you have open and you can find the maps bsp cubemaps. Ex: Levels/solo/m10/m10_cubemaps.... You won't immediately get perfect results right out of the extract due to several reasons. Reach has a proprietary game engine, 3ds max is a development suite for modeling/animation/presentation. The material setup for reach is specific and made to suite the games needs. The hex pattern is baked into the specular, and added through a detail map btw. Everything else is up to how you wanna do it within 3ds max. Can you direct me to which detail map? I've made a ton of progress and it's pretty near being indistinguishable from the in game model, other than the reflections (which is using a custom rainbow reflection map, (thanks master noob!) that makes the needler slightly iridescent) and the hexagonal pattern.  Edited by jabberwockxeno on Mar 11, 2013 at 08:24 AM |
||||
|
|
|||||
|
Alexis Joined: Nov 22, 2010 |
Posted: Mar 11, 2013 10:16 AM
Msg. 850 of 1188
Quote: --- Original message by: jabberwockxeno Quote: --- Original message by: waffles ^ The way you see it in Reach is due to extensive material setups within the engine itself. The cubemap is not a static single cubemap, I dare to say that reach almost entirely scrapped using static cubemaps for per bsp section cubemaps, locate the Levels directory for the map you have open and you can find the maps bsp cubemaps. Ex: Levels/solo/m10/m10_cubemaps.... You won't immediately get perfect results right out of the extract due to several reasons. Reach has a proprietary game engine, 3ds max is a development suite for modeling/animation/presentation. The material setup for reach is specific and made to suite the games needs. The hex pattern is baked into the specular, and added through a detail map btw. Everything else is up to how you wanna do it within 3ds max. Can you direct me to which detail map? I've made a ton of progress and it's pretty near being indistinguishable from the in game model, other than the reflections (which is using a custom rainbow reflection map, (thanks master noob!) that makes the needler slightly iridescent) and the hexagonal pattern. http://img577.imageshack.us/img577/1412/needler.jpg Edited by jabberwockxeno on Mar 11, 2013 at 08:24 AM For some reason, your setup makes it look more like Halo 4's needler to me 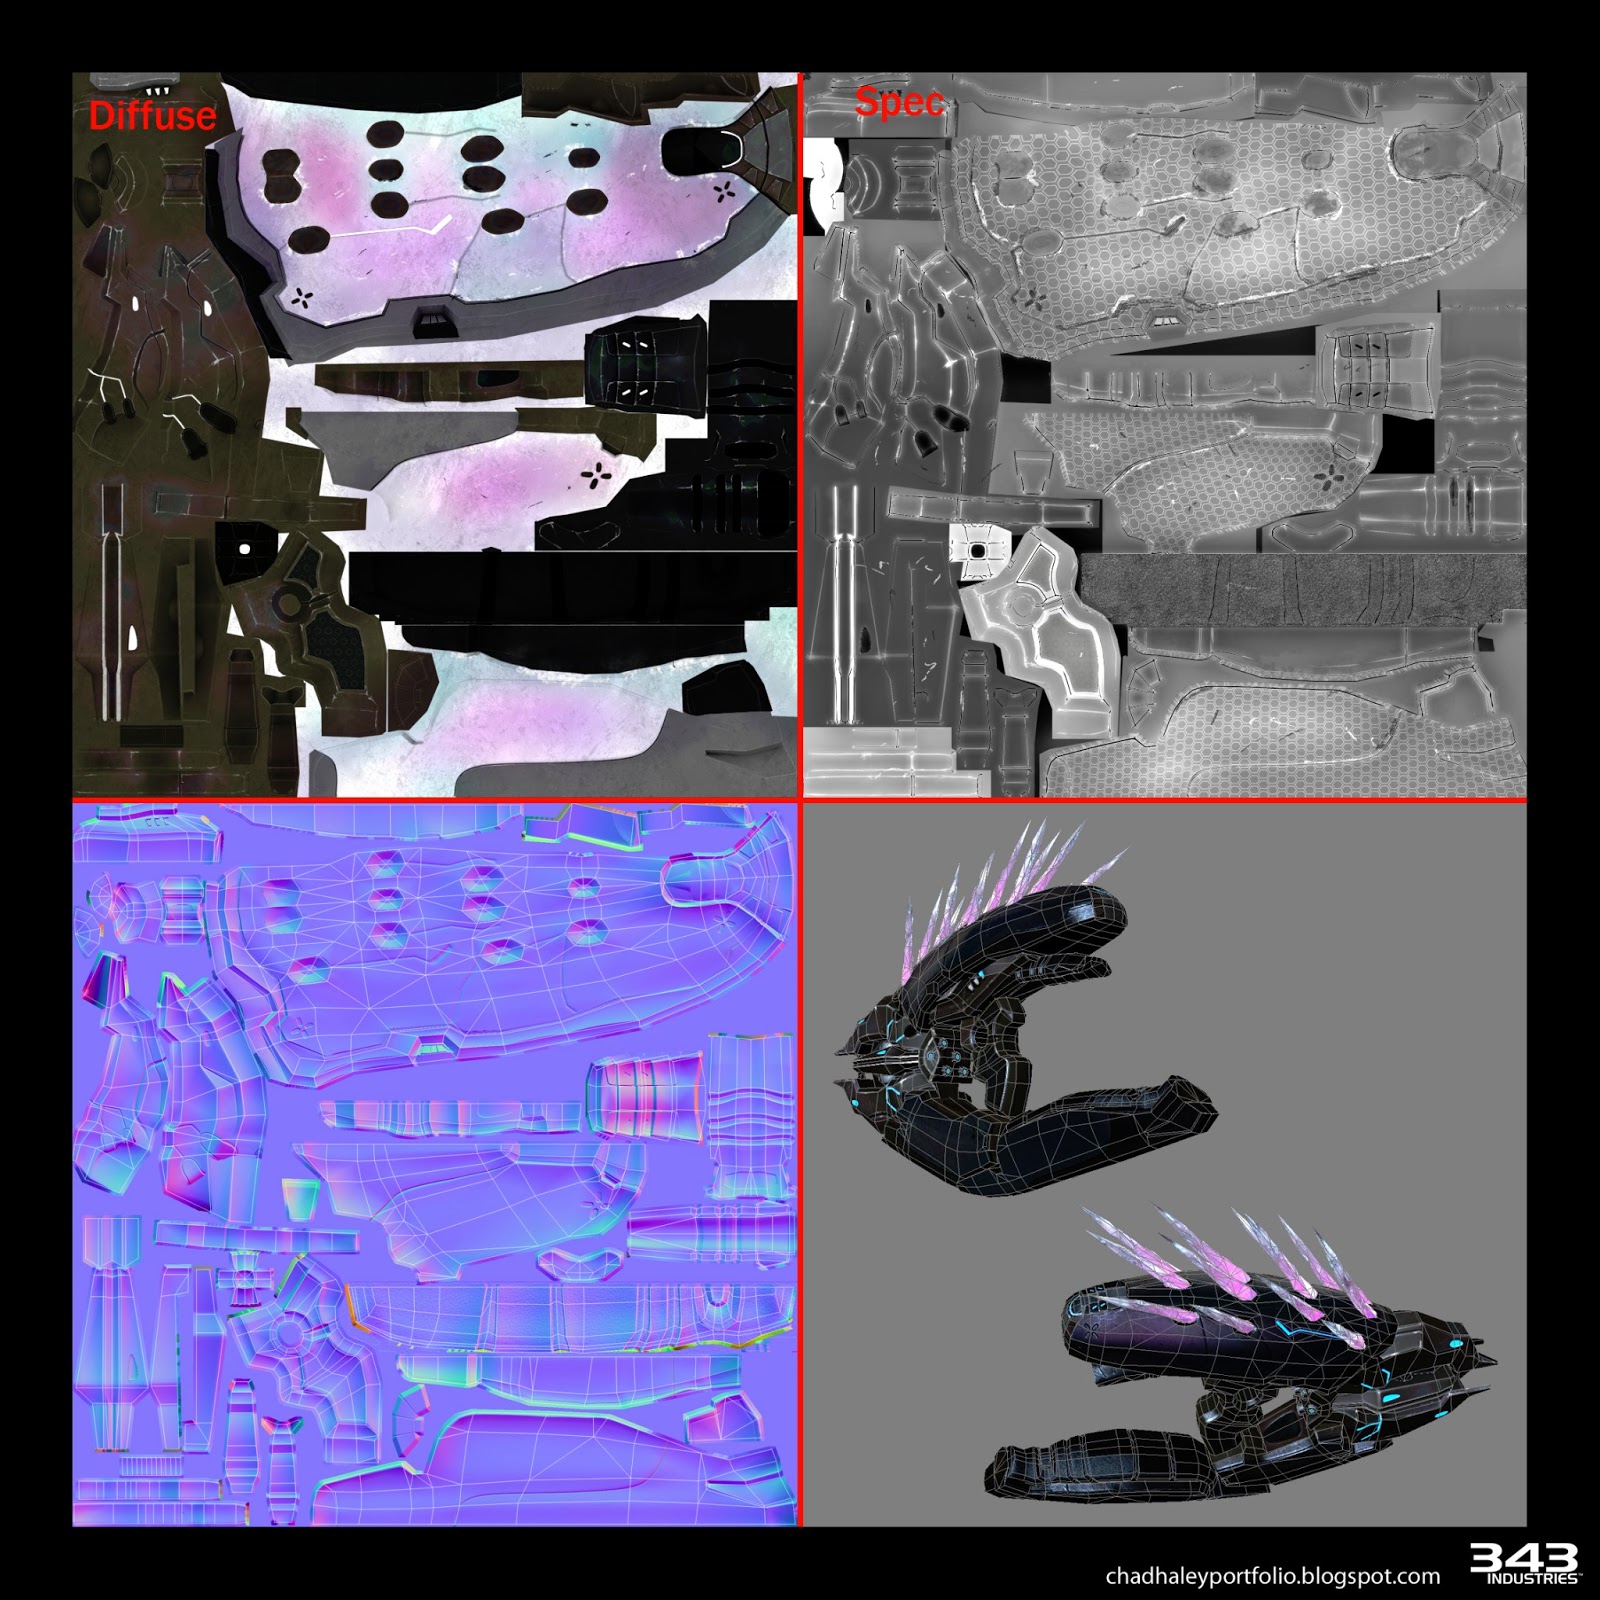 Perhaps try using the Cyborg Visor Cubemap, or the grunt reflection cubemaps, as they are used on covenant weapons in Halo 3 and 4. |
||||
|
|
|||||
|
Dumb AI Joined: Sep 18, 2011 
Dead. |
Posted: Mar 11, 2013 10:27 AM
Msg. 851 of 1188
There weren't a whole lot of changes from Halo Reach's to Halo 4's.
Mostly extra details that were probably modeled in and the color change from brown to purple. Edited by Dumb AI on Mar 11, 2013 at 10:28 AM |
||||
|
|
|||||
|
Alexis Joined: Nov 22, 2010 |
Posted: Mar 11, 2013 10:35 AM
Msg. 852 of 1188
Quote: --- Original message by: Dumb AI There weren't a whole lot of changes from Halo Reach's to Halo 4's. Mostly extra details that were probably modeled in and the color change from brown to purple. Edited by Dumb AI on Mar 11, 2013 at 10:28 AM Definitely... Geometry-wise, it looks identical. The shader setup on 4 seems to rely on CC masks to achieve color, judging by the pic I posted above Edited by Alexis on Mar 11, 2013 at 10:41 AM |
||||
|
|
|||||
|
jabberwockxeno Joined: Jan 16, 2013
|
Posted: Mar 11, 2013 01:55 PM
Msg. 853 of 1188
Quote: --- Original message by: Alexis Quote: --- Original message by: jabberwockxeno Quote: --- Original message by: waffles ^ The way you see it in Reach is due to extensive material setups within the engine itself. The cubemap is not a static single cubemap, I dare to say that reach almost entirely scrapped using static cubemaps for per bsp section cubemaps, locate the Levels directory for the map you have open and you can find the maps bsp cubemaps. Ex: Levels/solo/m10/m10_cubemaps.... You won't immediately get perfect results right out of the extract due to several reasons. Reach has a proprietary game engine, 3ds max is a development suite for modeling/animation/presentation. The material setup for reach is specific and made to suite the games needs. The hex pattern is baked into the specular, and added through a detail map btw. Everything else is up to how you wanna do it within 3ds max. Can you direct me to which detail map? I've made a ton of progress and it's pretty near being indistinguishable from the in game model, other than the reflections (which is using a custom rainbow reflection map, (thanks master noob!) that makes the needler slightly iridescent) and the hexagonal pattern. http://img577.imageshack.us/img577/1412/needler.jpg Edited by jabberwockxeno on Mar 11, 2013 at 08:24 AM For some reason, your setup makes it look more like Halo 4's needler to me http://3.bp.blogspot.com/-Tgf0gbsGP2c/UJqtzxqVf0I/AAAAAAAABX0/k1pEwOiLdKk/s1600/v_03_chad_haley_Halo_4_Needler_texture.jpg Perhaps try using the Cyborg Visor Cubemap, or the grunt reflection cubemaps, as they are used on covenant weapons in Halo 3 and 4. What confuses me is that the diffuse for the halo reach needler is more of a reddish-dull magenta maroon, and as seen in your image, for halo 4 it's "opal"ish. Where is the purple/brown for each coming from? Based on my set up, the only thing I can think off is the reflection slot. |
||||
|
|
|||||
|
Alexis Joined: Nov 22, 2010 |
Posted: Mar 11, 2013 02:13 PM
Msg. 854 of 1188
Quote: --- Original message by: jabberwockxeno Quote: --- Original message by: Alexis Quote: --- Original message by: jabberwockxeno Quote: --- Original message by: waffles ^ The way you see it in Reach is due to extensive material setups within the engine itself. The cubemap is not a static single cubemap, I dare to say that reach almost entirely scrapped using static cubemaps for per bsp section cubemaps, locate the Levels directory for the map you have open and you can find the maps bsp cubemaps. Ex: Levels/solo/m10/m10_cubemaps.... You won't immediately get perfect results right out of the extract due to several reasons. Reach has a proprietary game engine, 3ds max is a development suite for modeling/animation/presentation. The material setup for reach is specific and made to suite the games needs. The hex pattern is baked into the specular, and added through a detail map btw. Everything else is up to how you wanna do it within 3ds max. Can you direct me to which detail map? I've made a ton of progress and it's pretty near being indistinguishable from the in game model, other than the reflections (which is using a custom rainbow reflection map, (thanks master noob!) that makes the needler slightly iridescent) and the hexagonal pattern. http://img577.imageshack.us/img577/1412/needler.jpg Edited by jabberwockxeno on Mar 11, 2013 at 08:24 AM For some reason, your setup makes it look more like Halo 4's needler to me http://3.bp.blogspot.com/-Tgf0gbsGP2c/UJqtzxqVf0I/AAAAAAAABX0/k1pEwOiLdKk/s1600/v_03_chad_haley_Halo_4_Needler_texture.jpg Perhaps try using the Cyborg Visor Cubemap, or the grunt reflection cubemaps, as they are used on covenant weapons in Halo 3 and 4. What confuses me is that the diffuse for the halo reach needler is more of a reddish-dull magenta maroon, and as seen in your image, for halo 4 it's "opal"ish. Where is the purple/brown for each coming from? Based on my set up, the only thing I can think off is the reflection slot. Use those cubemaps I suggested. They have gold hue that will probably give you what you are looking for |
||||
|
|
|||||
|
jabberwockxeno Joined: Jan 16, 2013
|
Posted: Mar 11, 2013 02:16 PM
Msg. 855 of 1188
Quote: --- Original message by: Alexis Quote: --- Original message by: jabberwockxeno Quote: --- Original message by: Alexis Quote: --- Original message by: jabberwockxeno Quote: --- Original message by: waffles ^ The way you see it in Reach is due to extensive material setups within the engine itself. The cubemap is not a static single cubemap, I dare to say that reach almost entirely scrapped using static cubemaps for per bsp section cubemaps, locate the Levels directory for the map you have open and you can find the maps bsp cubemaps. Ex: Levels/solo/m10/m10_cubemaps.... You won't immediately get perfect results right out of the extract due to several reasons. Reach has a proprietary game engine, 3ds max is a development suite for modeling/animation/presentation. The material setup for reach is specific and made to suite the games needs. The hex pattern is baked into the specular, and added through a detail map btw. Everything else is up to how you wanna do it within 3ds max. Can you direct me to which detail map? I've made a ton of progress and it's pretty near being indistinguishable from the in game model, other than the reflections (which is using a custom rainbow reflection map, (thanks master noob!) that makes the needler slightly iridescent) and the hexagonal pattern. http://img577.imageshack.us/img577/1412/needler.jpg Edited by jabberwockxeno on Mar 11, 2013 at 08:24 AM For some reason, your setup makes it look more like Halo 4's needler to me http://3.bp.blogspot.com/-Tgf0gbsGP2c/UJqtzxqVf0I/AAAAAAAABX0/k1pEwOiLdKk/s1600/v_03_chad_haley_Halo_4_Needler_texture.jpg Perhaps try using the Cyborg Visor Cubemap, or the grunt reflection cubemaps, as they are used on covenant weapons in Halo 3 and 4. What confuses me is that the diffuse for the halo reach needler is more of a reddish-dull magenta maroon, and as seen in your image, for halo 4 it's "opal"ish. Where is the purple/brown for each coming from? Based on my set up, the only thing I can think off is the reflection slot. Use those cubemaps I suggested. They have gold hue that will probably give you what you are looking for Are they from CE? I don't know how to extract CE assets. |
||||
|
|
|||||
|
Alexis Joined: Nov 22, 2010 |
Posted: Mar 11, 2013 02:22 PM
Msg. 856 of 1188
Quote: --- Original message by: jabberwockxeno Quote: --- Original message by: Alexis Quote: --- Original message by: jabberwockxeno Quote: --- Original message by: Alexis Quote: --- Original message by: jabberwockxeno Quote: --- Original message by: waffles ^ The way you see it in Reach is due to extensive material setups within the engine itself. The cubemap is not a static single cubemap, I dare to say that reach almost entirely scrapped using static cubemaps for per bsp section cubemaps, locate the Levels directory for the map you have open and you can find the maps bsp cubemaps. Ex: Levels/solo/m10/m10_cubemaps.... You won't immediately get perfect results right out of the extract due to several reasons. Reach has a proprietary game engine, 3ds max is a development suite for modeling/animation/presentation. The material setup for reach is specific and made to suite the games needs. The hex pattern is baked into the specular, and added through a detail map btw. Everything else is up to how you wanna do it within 3ds max. Can you direct me to which detail map? I've made a ton of progress and it's pretty near being indistinguishable from the in game model, other than the reflections (which is using a custom rainbow reflection map, (thanks master noob!) that makes the needler slightly iridescent) and the hexagonal pattern. http://img577.imageshack.us/img577/1412/needler.jpg Edited by jabberwockxeno on Mar 11, 2013 at 08:24 AM For some reason, your setup makes it look more like Halo 4's needler to me http://3.bp.blogspot.com/-Tgf0gbsGP2c/UJqtzxqVf0I/AAAAAAAABX0/k1pEwOiLdKk/s1600/v_03_chad_haley_Halo_4_Needler_texture.jpg Perhaps try using the Cyborg Visor Cubemap, or the grunt reflection cubemaps, as they are used on covenant weapons in Halo 3 and 4. What confuses me is that the diffuse for the halo reach needler is more of a reddish-dull magenta maroon, and as seen in your image, for halo 4 it's "opal"ish. Where is the purple/brown for each coming from? Based on my set up, the only thing I can think off is the reflection slot. Use those cubemaps I suggested. They have gold hue that will probably give you what you are looking for Are they from CE? I don't know how to extract CE assets. Yeah, CE. Though, you could also find them in Reach and Halo 3 maps. I can try to get them for you a bit later today.if you would like. Edited by Alexis on Mar 11, 2013 at 02:26 PM |
||||
|
|
|||||
|
DarkestSeptagon Joined: Nov 29, 2012
|
Posted: Mar 11, 2013 07:57 PM
Msg. 857 of 1188
Quote: --- Original message by: Roxasguy That's happened to me once, which objects give you that error?Hello, I keep getting an error when I try to extract things. I can extract some things just fine, no errors, but most things Adjutant gives me this: --Index was out of range. Must be non-negative and less than the size of the collection. Parameter name: startIndex Just about the only things I can extract are forge objects and their bitmaps. Nothing else. Please help me. I'm desperate! |
||||
|
|
|||||
|
DarkestSeptagon Joined: Nov 29, 2012
|
Posted: Mar 12, 2013 09:46 AM
Msg. 858 of 1188
Quote: --- Original message by: Roxasguy Pretty sure Gravemind said Halo 4 support will not be coming to Adjutant. Though a bsp extractor would be lovely for buildings.Will upcoming versions of Adjutant have support for Halo 4 maps? ---Roxasguy |
||||
|
|
|||||
|
jabberwockxeno Joined: Jan 16, 2013
|
Posted: Mar 12, 2013 11:26 AM
Msg. 859 of 1188
Can I suggest a feature?
Say I am extracting the plasma rifle object folder. Have adjutant pop up and list all of the files the 3d model depends on for textures and stuff, and have it ask if you if you want to extract those, too. Then, have the resulting sub object mat in the emf file once importex to max auto change the pathways to whatever the extracted pathways was. |
||||
|
|
|||||
|
jabberwockxeno Joined: Jan 16, 2013
|
Posted: Mar 12, 2013 11:46 AM
Msg. 860 of 1188
Quote: --- Original message by: Roxasguy I agree! That would be very nice! I suggest also adding animation export and then importing them to 3ds max. This would make Adjutant unbelievable!!!! Well, I have the feeling both of our ideas are very techincally difficult. Anyways, I heard the hexagonal bitmaps I need are objects\characters\elite\bitmapcov_hex_detail_gray and objects\characters\elite\bitmapcov_hex_detail_normal Which slot to I put them in? All of the common sense ones are already in use, and unless I use a composite mat with the current maps and those two into a node, it won't fit, but I don't think that would come out right. Furthermore, testing with those two in specular/bump alone don't result in it being more visble. |
||||
|
|
|||||
|
Alexis Joined: Nov 22, 2010 |
Posted: Mar 12, 2013 04:03 PM
Msg. 861 of 1188
Quote: --- Original message by: jabberwockxeno Quote: --- Original message by: Roxasguy I agree! That would be very nice! I suggest also adding animation export and then importing them to 3ds max. This would make Adjutant unbelievable!!!! Well, I have the feeling both of our ideas are very techincally difficult. Anyways, I heard the hexagonal bitmaps I need are objects\characters\elite\bitmapcov_hex_detail_gray and objects\characters\elite\bitmapcov_hex_detail_normal Which slot to I put them in? All of the common sense ones are already in use, and unless I use a composite mat with the current maps and those two into a node, it won't fit, but I don't think that would come out right. Furthermore, testing with those two in specular/bump alone don't result in it being more visble. Multiply it with your diffuse texture and or the specular slot. Also, did you try those cubemaps yet? Edited by Alexis on Mar 12, 2013 at 04:05 PM |
||||
|
|
|||||
|
jabberwockxeno Joined: Jan 16, 2013
|
Posted: Mar 12, 2013 04:18 PM
Msg. 862 of 1188
Quote: --- Original message by: Alexis Quote: --- Original message by: jabberwockxeno Quote: --- Original message by: Roxasguy I agree! That would be very nice! I suggest also adding animation export and then importing them to 3ds max. This would make Adjutant unbelievable!!!! Well, I have the feeling both of our ideas are very techincally difficult. Anyways, I heard the hexagonal bitmaps I need are objects\characters\elite\bitmapcov_hex_detail_gray and objects\characters\elite\bitmapcov_hex_detail_normal Which slot to I put them in? All of the common sense ones are already in use, and unless I use a composite mat with the current maps and those two into a node, it won't fit, but I don't think that would come out right. Furthermore, testing with those two in specular/bump alone don't result in it being more visble. Multiply it with your diffuse texture and or the specular slot. Also, did you try those cubemaps yet? Edited by Alexis on Mar 12, 2013 at 04:05 PM I'm not quite sure I know what you mean by multiply. You mean the MathColorMultiply MetaSL shader? Anyways, I suppose for the normal map I could just plug it into the additional bump slot of the normal bump shader... I tried the _gray/diffuse/specular/whichever it goes in (help on that?) one in the displacement, I can see it's not sized/tiled right. I really hope I don't have to guess what the right value is. EDIT: Haven't tried them yet. Can you point me to the pathway for them as they are in reach? Edited by jabberwockxeno on Mar 12, 2013 at 04:23 PM |
||||
|
|
|||||
|
Alexis Joined: Nov 22, 2010 |
Posted: Mar 12, 2013 04:22 PM
Msg. 863 of 1188
Quote: --- Original message by: jabberwockxeno Quote: --- Original message by: Alexis Quote: --- Original message by: jabberwockxeno Quote: --- Original message by: Roxasguy I agree! That would be very nice! I suggest also adding animation export and then importing them to 3ds max. This would make Adjutant unbelievable!!!! Well, I have the feeling both of our ideas are very techincally difficult. Anyways, I heard the hexagonal bitmaps I need are objects\characters\elite\bitmapcov_hex_detail_gray and objects\characters\elite\bitmapcov_hex_detail_normal Which slot to I put them in? All of the common sense ones are already in use, and unless I use a composite mat with the current maps and those two into a node, it won't fit, but I don't think that would come out right. Furthermore, testing with those two in specular/bump alone don't result in it being more visble. Multiply it with your diffuse texture and or the specular slot. Also, did you try those cubemaps yet? Edited by Alexis on Mar 12, 2013 at 04:05 PM I'm not quite sure I know what you mean by multiply. You mean the MathColorMultiply MetaSL shader? Anyways, I suppose for the normal map I could just plug it into the additional bump slot of the normal bump shader... I tried the _gray/diffuse/specular/whichever it goes in (help on that?) one in the displacement, I can see it's not sized/tiled right. I really hope I don't have to guess what the right value is. If you are using max, there should be a material called multiply. Other programd should have a standard multiply material. The guns don't use a hex normal map... Just a tiled diffuse Here is a quick and very dirty render.  Edited by Alexis on Mar 12, 2013 at 06:54 PM |
||||
|
|
|||||
|
Cheddars Joined: Oct 30, 2010 
Rave to the Grave. |
Posted: Mar 13, 2013 04:59 AM
Msg. 864 of 1188
Hey, it would be sweet if you could add the change colour information into the meta viewer for halo reach. For halo 3 its possible but for some reason the colours wont show up.
|
||||
|
|
|||||
|
jabberwockxeno Joined: Jan 16, 2013
|
Posted: Mar 13, 2013 08:10 AM
Msg. 865 of 1188
Quote: --- Original message by: Alexis Quote: --- Original message by: jabberwockxeno Quote: --- Original message by: Alexis Quote: --- Original message by: jabberwockxeno Quote: --- Original message by: Roxasguy I agree! That would be very nice! I suggest also adding animation export and then importing them to 3ds max. This would make Adjutant unbelievable!!!! Well, I have the feeling both of our ideas are very techincally difficult. Anyways, I heard the hexagonal bitmaps I need are objects\characters\elite\bitmapcov_hex_detail_gray and objects\characters\elite\bitmapcov_hex_detail_normal Which slot to I put them in? All of the common sense ones are already in use, and unless I use a composite mat with the current maps and those two into a node, it won't fit, but I don't think that would come out right. Furthermore, testing with those two in specular/bump alone don't result in it being more visble. Multiply it with your diffuse texture and or the specular slot. Also, did you try those cubemaps yet? Edited by Alexis on Mar 12, 2013 at 04:05 PM I'm not quite sure I know what you mean by multiply. You mean the MathColorMultiply MetaSL shader? Anyways, I suppose for the normal map I could just plug it into the additional bump slot of the normal bump shader... I tried the _gray/diffuse/specular/whichever it goes in (help on that?) one in the displacement, I can see it's not sized/tiled right. I really hope I don't have to guess what the right value is. If you are using max, there should be a material called multiply. Other programd should have a standard multiply material. The guns don't use a hex normal map... Just a tiled diffuse Here is a quick and very dirty render. http://img803.imageshack.us/img803/2195/prtest.jpg Edited by Alexis on Mar 12, 2013 at 06:54 PM I see no such multiply mat. What tile/offset/scale value did you use in that render? And how'd you get the glowy bits so bright? Can't be normal self illumination. Edited by jabberwockxeno on Mar 13, 2013 at 08:42 AM |
||||
|
|
|||||
|
Alexis Joined: Nov 22, 2010 |
Posted: Mar 13, 2013 10:43 AM
Msg. 866 of 1188
Quote: --- Original message by: jabberwockxeno Quote: --- Original message by: Alexis Quote: --- Original message by: jabberwockxeno Quote: --- Original message by: Alexis Quote: --- Original message by: jabberwockxeno Quote: --- Original message by: Roxasguy I agree! That would be very nice! I suggest also adding animation export and then importing them to 3ds max. This would make Adjutant unbelievable!!!! Well, I have the feeling both of our ideas are very techincally difficult. Anyways, I heard the hexagonal bitmaps I need are objects\characters\elite\bitmapcov_hex_detail_gray and objects\characters\elite\bitmapcov_hex_detail_normal Which slot to I put them in? All of the common sense ones are already in use, and unless I use a composite mat with the current maps and those two into a node, it won't fit, but I don't think that would come out right. Furthermore, testing with those two in specular/bump alone don't result in it being more visble. Multiply it with your diffuse texture and or the specular slot. Also, did you try those cubemaps yet? Edited by Alexis on Mar 12, 2013 at 04:05 PM I'm not quite sure I know what you mean by multiply. You mean the MathColorMultiply MetaSL shader? Anyways, I suppose for the normal map I could just plug it into the additional bump slot of the normal bump shader... I tried the _gray/diffuse/specular/whichever it goes in (help on that?) one in the displacement, I can see it's not sized/tiled right. I really hope I don't have to guess what the right value is. If you are using max, there should be a material called multiply. Other programd should have a standard multiply material. The guns don't use a hex normal map... Just a tiled diffuse Here is a quick and very dirty render. http://img803.imageshack.us/img803/2195/prtest.jpg Edited by Alexis on Mar 12, 2013 at 06:54 PM I see no such multiply mat. What tile/offset/scale value did you use in that render? And how'd you get the glowy bits so bright? Can't be normal self illumination. Edited by jabberwockxeno on Mar 13, 2013 at 08:42 AM RGB Multiply is the actual name. Under the Material browser where you select 'Standard' 'Multi/sub Object', etc. The detail map is 13.3 U and 13 V. The glow is a standard Self Illumination. The Light bitmap is in the Illum slot, alpha in opacity, and an RGB Multiply of a tint map and the light's Diffuse to tint it blue |
||||
|
|
|||||
|
jabberwockxeno Joined: Jan 16, 2013
|
Posted: Mar 13, 2013 12:32 PM
Msg. 867 of 1188
Quote: --- Original message by: Alexis Quote: --- Original message by: jabberwockxeno Quote: --- Original message by: Alexis Quote: --- Original message by: jabberwockxeno Quote: --- Original message by: Alexis Quote: --- Original message by: jabberwockxeno Quote: --- Original message by: Roxasguy I agree! That would be very nice! I suggest also adding animation export and then importing them to 3ds max. This would make Adjutant unbelievable!!!! Well, I have the feeling both of our ideas are very techincally difficult. Anyways, I heard the hexagonal bitmaps I need are objects\characters\elite\bitmapcov_hex_detail_gray and objects\characters\elite\bitmapcov_hex_detail_normal Which slot to I put them in? All of the common sense ones are already in use, and unless I use a composite mat with the current maps and those two into a node, it won't fit, but I don't think that would come out right. Furthermore, testing with those two in specular/bump alone don't result in it being more visble. Multiply it with your diffuse texture and or the specular slot. Also, did you try those cubemaps yet? Edited by Alexis on Mar 12, 2013 at 04:05 PM I'm not quite sure I know what you mean by multiply. You mean the MathColorMultiply MetaSL shader? Anyways, I suppose for the normal map I could just plug it into the additional bump slot of the normal bump shader... I tried the _gray/diffuse/specular/whichever it goes in (help on that?) one in the displacement, I can see it's not sized/tiled right. I really hope I don't have to guess what the right value is. If you are using max, there should be a material called multiply. Other programd should have a standard multiply material. The guns don't use a hex normal map... Just a tiled diffuse Here is a quick and very dirty render. http://img803.imageshack.us/img803/2195/prtest.jpg Edited by Alexis on Mar 12, 2013 at 06:54 PM I see no such multiply mat. What tile/offset/scale value did you use in that render? And how'd you get the glowy bits so bright? Can't be normal self illumination. Edited by jabberwockxeno on Mar 13, 2013 at 08:42 AM RGB Multiply is the actual name. Under the Material browser where you select 'Standard' 'Multi/sub Object', etc. The detail map is 13.3 U and 13 V. The glow is a standard Self Illumination. The Light bitmap is in the Illum slot, alpha in opacity, and an RGB Multiply of a tint map and the light's Diffuse to tint it blue Can you just apply the glowing mat to a sphere and upload the max file for me? And can you tell me which slot I should be multiplying the hex pattern with? Diffuse, or specular? Edited by jabberwockxeno on Mar 13, 2013 at 10:09 PM Edited by jabberwockxeno on Mar 13, 2013 at 10:10 PM |
||||
|
|
|||||
|
videoman Joined: Feb 2, 2008 
We are Microsoft, Resistance is Futile |
Posted: Mar 18, 2013 02:36 PM
Msg. 868 of 1188
Not sure if this is what Gravemind was talking about when he said "Halo Reach's Broken Rigs" but for some bizarre reason, the whole left side of the Marine/ODST rig is all screwed up. Meaning that basically all the bones on the left side of the rig are not positioned in the right way. I have tried importing into both 3ds Max 9 (Not 2009) as well as 3ds Max 2012 64-bit, but no luck in difference in the importing process.
Is a issues with the importer? Or is it just how Bungie rigged their models for Halo Reach? Thanks, and keep up the awesome work Gravemind! |
||||
|
|
|||||
|
Maniac1000 -Helpful Poster- Joined: Feb 24, 2007 
|
Posted: Mar 18, 2013 02:39 PM
Msg. 869 of 1188
Mirror the skin modifier from the correct side to to the messed up side.
|
||||
|
|
|||||
|
videoman Joined: Feb 2, 2008
We are Microsoft, Resistance is Futile |
Posted: Mar 18, 2013 02:47 PM
Msg. 870 of 1188
Quote: --- Original message by: Maniac1000 Mirror the skin modifier from the correct side to to the messed up side. Thanks Maniac, but I think you might (MIGHT) be misunderstanding what I am talking about. Here is a quick screenshot of what I am talking about.  That is what I am talking about. And unless I want to re-rig the whole entire model (Which I really don't want to if I don't have to), I have no idea what is going wrong and how to fix it. Thanks |
||||
|
|
|||||
|
videoman Joined: Feb 2, 2008
We are Microsoft, Resistance is Futile |
Posted: Mar 18, 2013 04:03 PM
Msg. 871 of 1188
Sorry about that waffles, i did not intend to annoy you. I just was unsure if this slight issue could be fixed. Thanks though for retyping all that, even though you could have used a link or something. :D
Thanks again waffles for the help. PS: I know that importing animations from Halo CE to Halo 3 work just fine (after some bone renaming), but when doing so from Halo CE to Halo Reach....it seems to make the model all screwy and the mesh does not animate correctly. Do you know why this is waffles? Or anyone else know why this is? |
||||
|
|
|||||
|
Ecelon Joined: Mar 12, 2013 
|
Posted: Mar 19, 2013 09:54 PM
Msg. 872 of 1188
I was wondering if anyone knows how to export 'spartan_flair_xxx' models. Seems that I can only extract the ODST chest / ODST Shoulders / Juns Chest piece. I've been trying to figure it out for the past few days, with no luck. Though I did manage to extract them as .obj, but it was 1 single object and would take forever to break them apart!
|
||||
|
|
|||||
|
R93_Sniper Joined: Feb 13, 2011 
When in Doubt, RUN! |
Posted: Mar 19, 2013 10:12 PM
Msg. 873 of 1188
So as not to threadjack, i posted the entire halo reach marine with IKs and corrected bonesetup on my personal thread to check out
as for you Echelon, Gravemind posted a link to all Halo Reach Spartan permutations as an EMF, check it out |
||||
|
|
|||||
|
Gravemind Joined: Jul 28, 2009
The Age of Reclamation has begun. |
Posted: Mar 19, 2013 10:48 PM
Msg. 874 of 1188
Quote: --- Original message by: Ecelon I was wondering if anyone knows how to export 'spartan_flair_xxx' models. Seems that I can only extract the ODST chest / ODST Shoulders / Juns Chest piece. I've been trying to figure it out for the past few days, with no luck. Though I did manage to extract them as .obj, but it was 1 single object and would take forever to break them apart! These permutations can only be exported via the model viewer. Open the spartans model in the viewer, and there should be an "Unknown" permutation. This contains all the different parts which were previously missing, however they will not be correctly named. You can use the viewer to see which part is which, or just extract all of them. |
||||
|
|
|||||
|
Ecelon Joined: Mar 12, 2013
|
Posted: Mar 19, 2013 11:19 PM
Msg. 875 of 1188
Quote: --- Original message by: R93_Sniper as for you Echelon, Gravemind posted a link to all Halo Reach Spartan permutations as an EMF, check it out Thanks R93. I looked for it for quiet awhile and couldn't find it. Quote: --- Original message by: Gravemind Quote: --- Original message by: Ecelon I was wondering if anyone knows how to export 'spartan_flair_xxx' models. Seems that I can only extract the ODST chest / ODST Shoulders / Juns Chest piece. I've been trying to figure it out for the past few days, with no luck. Though I did manage to extract them as .obj, but it was 1 single object and would take forever to break them apart! These permutations can only be exported via the model viewer. Open the spartans model in the viewer, and there should be an "Unknown" permutation. This contains all the different parts which were previously missing, however they will not be correctly named. You can use the viewer to see which part is which, or just extract all of them. I've checked the "Spartan" model in the model viewer and couldn't find "Unkown" in any of the permutations. All I've got, are "Player_xxx" strings. |
||||
|
|
|||||
| Page 25 of 34 | Go to page: · 1 · ... · 22 · 23 · 24 · [25] · 26 · 27 · 28 · ... · 34 · Prev · Next |

|