A Community discussion forum for Halo Custom Edition, Halo 2 Vista, Portal and Halo Machinima
|
| »Forums Index »Halo Custom Edition (Bungie/Gearbox) »Halo CE General Discussion »SWMT | 
|
| Page 1 of 16 | Go to page: · [1] · 2 · 3 · 4 · 5 · 6 · 7 · 8 · ... · 16 · Next |
| Author | Topic: SWMT (538 messages, Page 1 of 16) | ||||
| Moderators: Dennis | |||||
|
Jay2645 Joined: Mar 29, 2007 
Cortana saw you naked. |
Posted: Feb 11, 2008 05:31 PM
Msg. 1 of 538
This is the official thread for the SWMT (Star Wars Mapping Team). For those of you who are unfamiliar with the team, our goal is to bring accurate representations of Star Wars locales, weapons, vehicles, and bipeds from both the movies and Expanded Universe into Halo CE.
Here is a sampling of things to come: WEAPON LIST: REBELLION: A280 Assault Cannon Concussion Grenade DH-17 Lightsaber PLEX Missiles EMPIRE: E-11 FC-1 Flechette Launcher Imperial Heavy Repeater T-28 repeating sniper rifle Thermal detonator DL-44 CR-24 Flame Rifle WEAPON STATISTICS: Name: Description STATS: Power Overheat Battery Notes SECONDARY STATS (If applicable): Power Overheat Battery Notes E-11: The Empire's primary blaster, which is typically held in the hands of Stormtroopers, the E-11 has the same advantage and flaws as other Imperial weaponry. Being mass-produced cheaply with as much power as possible, it is powerful and has a large battery, but it overheats quickly with very low accuracy. 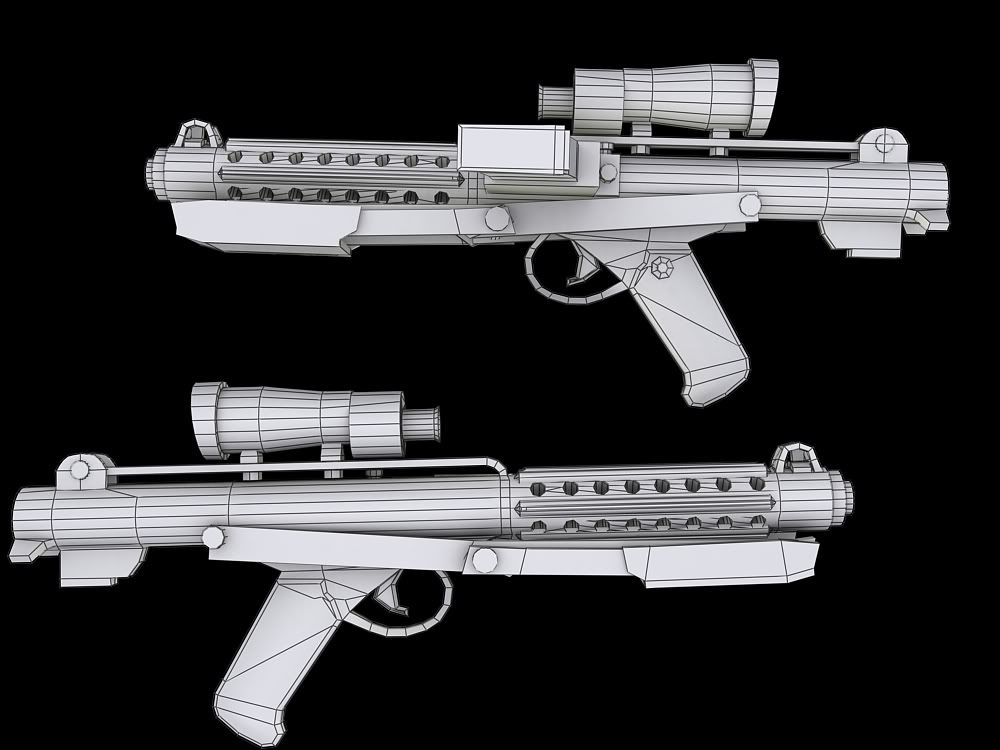 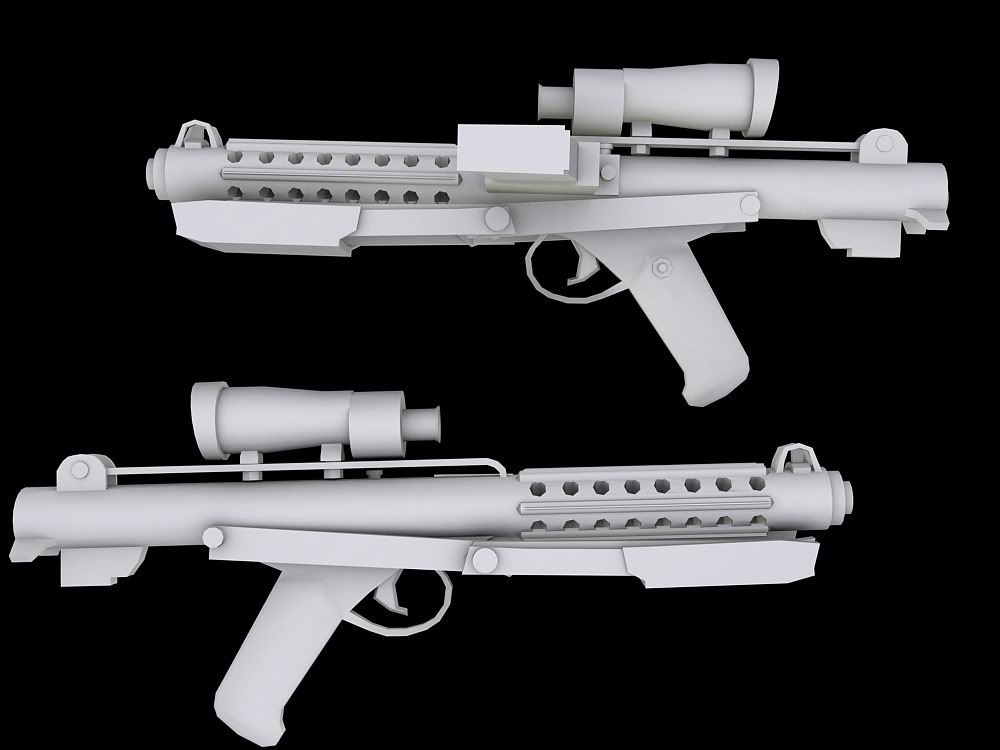  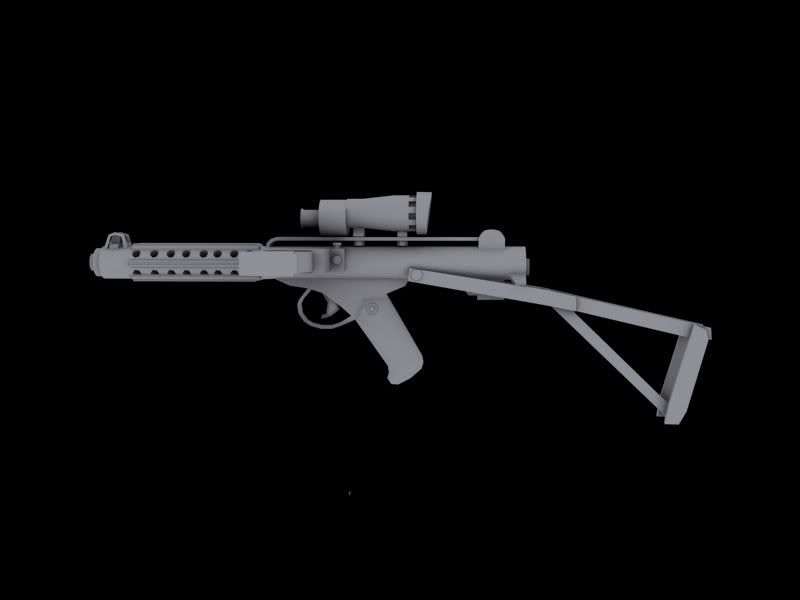 "Ready" Animation: http://www.youtube.com/watch?v=fsL5bmZK7bE  STATS: 2-3 shots/kill 3 shots to overheat 60 shots/battery Accuracy: Low A280: The Rebellion counterpart to the E-11 Blaster of the Empire, it is the opposite of the E-11 in virtually every way. It takes a while to overheat and is nearly perfect in its accuracy, but it has a smaller clip and does less damage than the E-11. 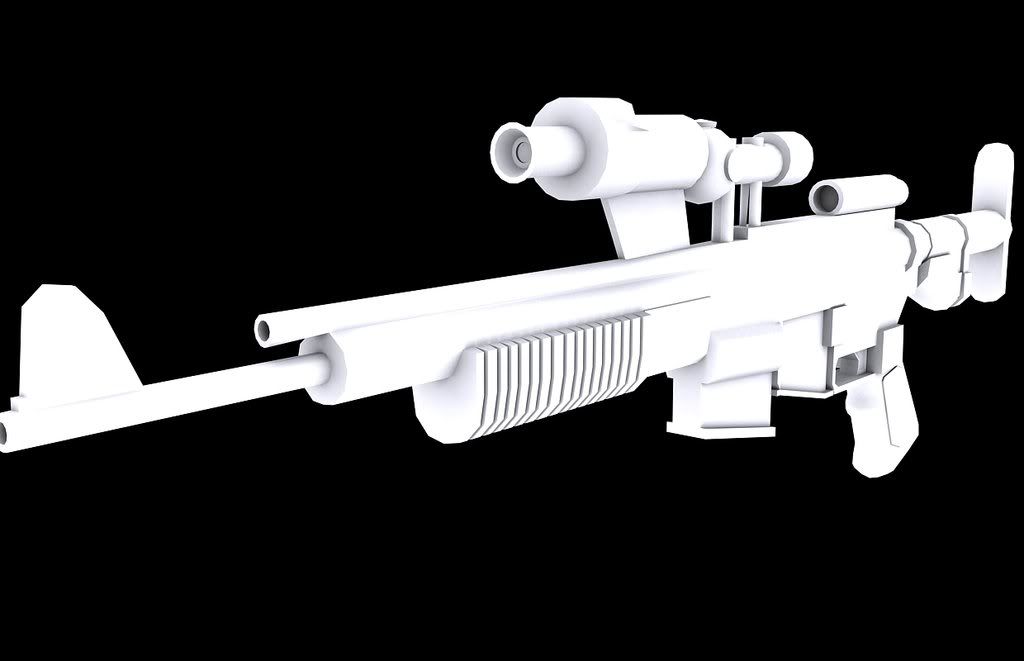  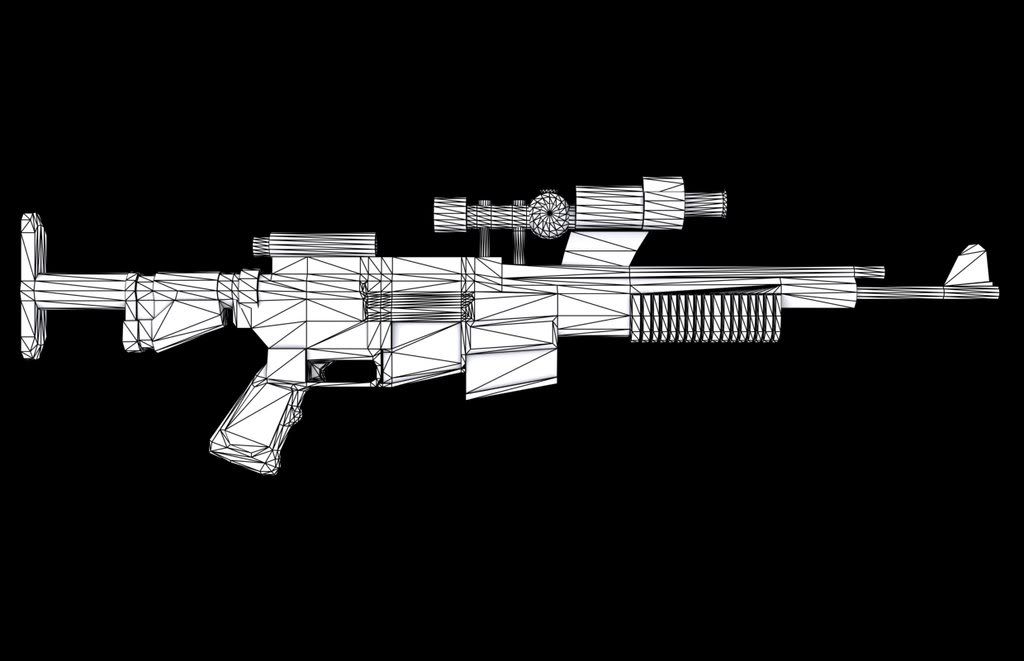 STATS: 4-5 shots\kill 10 shots to overheat 30 shots/battery Accuracy: High DL-44: Standard-Issue Imperial sidearm and the preferred weapon of smuggler Han Solo, the DL-44 has a fairly large battery with high power, but it overheats quickly and fires slowly. STATS: 3-4 shots/kill 4 shots to overheat 12 shots/battery Accuracy: Medium DH-17: The Standard-Issue Rebellion sidearm, the DH-17 fires quickly and overheats slowly. While it has a smaller clip and lower power than its Imperial counterpart, it is formidable in its own right. STATS: 5-6 shots/kill 6 shots to overheat 8 shots/battery Accuracy: Medium Imperial Heavy Repeater: A weapon which uses metallic bolts instead of blaster bolts, this "Slugthrower", as bullet-based weapons are called, is used to kill Jedi and annihilate any threat with a sheer volume of bullets. However, it can also fire a large glob of molten metal from its lower barrel. This metal is held together electromagnetically, and the electromagnetic layer dissipates upon impact with another surface, creating a large, hot explosion. STATS: 33 shots/kill 420 shots to overheat 132 shots/clip Accuracy: Low SECONDARY STATS: 1 shot/kill 1 shot/overheat 3 shots/clip Must use ballistic aiming FC-1 Flechette Launcher: Another "Slugthrower" weapon, this weapon is descended from the shotgun of Pre-Republic times. While it has a measly amount of shots before it has to reload and every round must be "chambered" before firing, it is extremely deadly. It has an anti-vehicle mode as well, which, although it only has two shots before it needs to reload, can penetrate 10 centimeters of armor before stopping. The anti-vehicle mode launches a canister which tracks the nearest heat source, detonating after 10 meters of flight, spraying flechettes into its target. A pointed end at the front of the flechette allows for it to stick to a closer target before detonation. 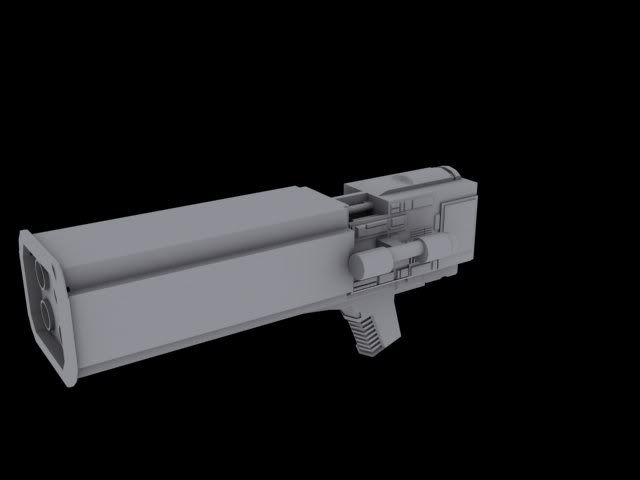 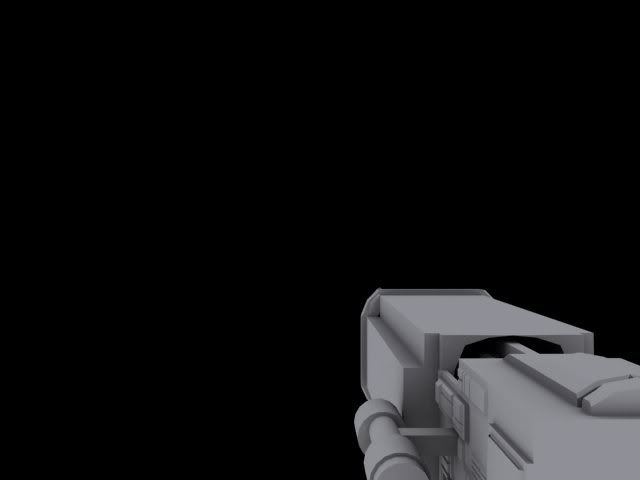 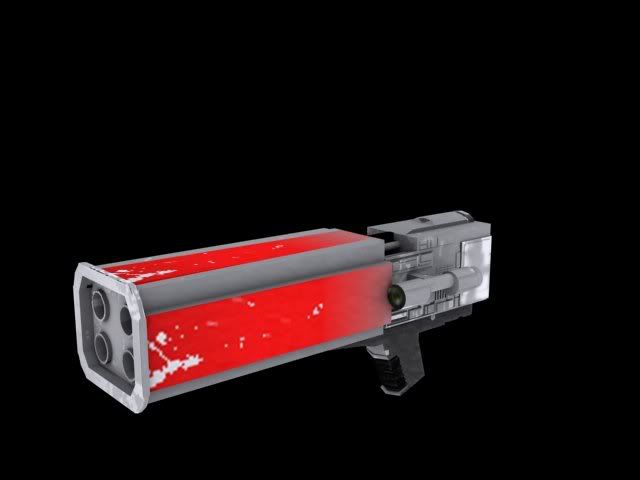 STATS: 1-2 shots/kill 30 shots to overheat 4 shots/clip Must be chambered SECONDARY STATS: 1 shot/kill 16 shots to overheat 2 shots/clip Homing rounds travel 10 meters before detonation and spread. Any closer sticks. T-28 repeating sniper rifle: One of the best of its class, the T-28 is given to both Rebel and Imperial snipers. It features an extra-long barrel which helps to straighten out the blaster bolt, allowing for near-perfect accuracy when sniping. It has a fast overheat when compared to other weapons of its class, but it makes up for this by the sheer power of its bolts. STATS: 1-2 shots/kill 3 shots to overheat 4 shots/battery 2 Zoom Levels CR-24 Flame Rifle: The CR-24 is mainly used as a defoliant and riot control device. While not the most practical of weapons, it is designed to inspire fear in the enemy ranks. While neither side "officially" uses it for more than a defoliant, the CR-24 is commonly seen in both Rebellion and Imperial hands. 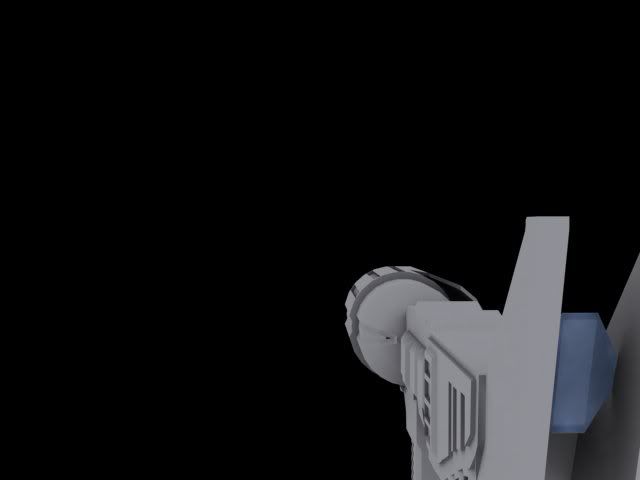   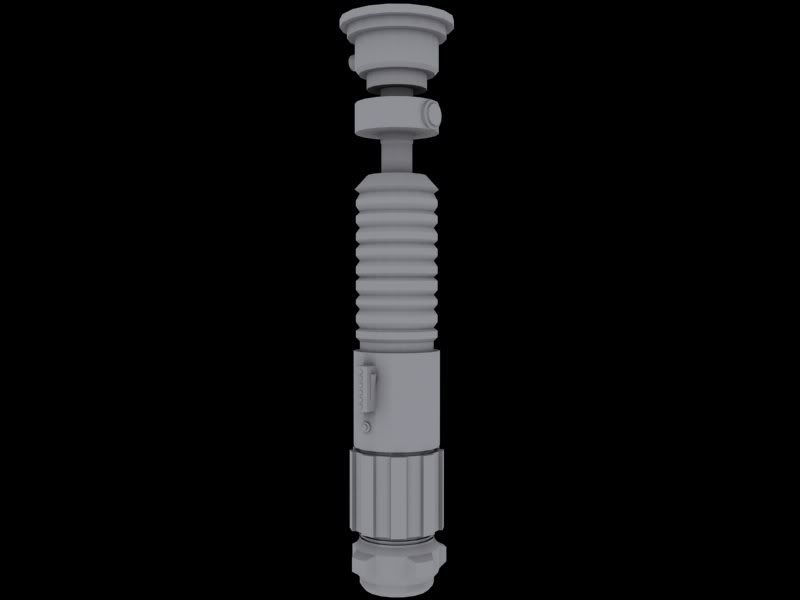 STATS: 1 shot/kill No overheat No Clip Close range/Melee only Assault Cannon: Developed as part of the Imperial's Dark Trooper project, the Assault Cannon was the primary weapon of the Dark Trooper Phase II. It featured a blue-white plasma shot capable of incinerating even the most heavily armored Stormtroopers as a primary weapon, with a dumb-fire rocket launcher as a secondary fire. Its deadliness is reflected in the long wait times before firing the primary weapon, and the fact that the secondary fire cannot be reloaded on the battlefield. STATS: 1 shot/kill 1 shot to overheat 2 shots/battery Must charge to fire SECONDARY STATS: 1 shot/kill No overheat 4 shots/clip Cannot reload PLEX Missiles: The PLX-2M Missile Launcher, sometimes referred to as the Plex-Twoem, was designed to take down vehicles with great ease. Rebel forces using the weapon on the battlefield reported taking down an AT-ST with 3 hits. It features a "Smart" tracking device, which is activated by holding down the fire button for longer than 3 seconds. This tracking device homes in on the largest heat source within range, decimating its target. It carries 6 Arakyd Industries 3t3 missiles per clip. 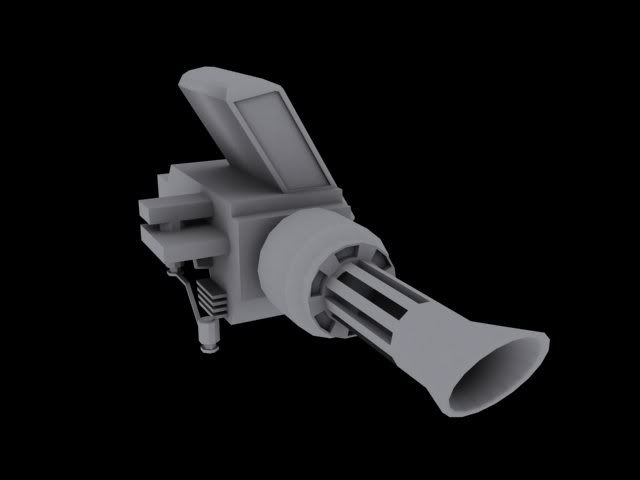 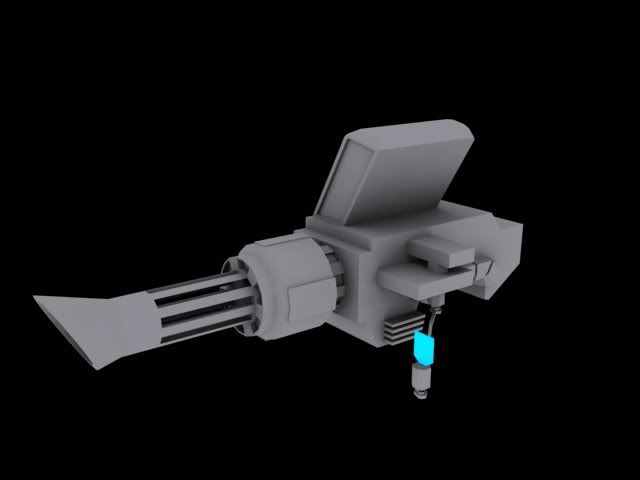 STATS: 1 shot/kill No overheat 6 shots/clip Has dummy and homing modes Oddball Skull: Poor TK-264 lost his head for disobeying Lord Vader's wishes. However, the microcomputer built into his helmet had crucial information regarding Imperial strength and troop placement. If the Rebels can upload it to their base, the Empire will be in serious trouble. If the Empire can delete the data before the Rebels can upload it, however, the threat will be eliminated.    STATS: 2 hits/kill No overheat No battery Melee Only GRENADE STATISTICS: Meter Kill Radius Meter Shock Wave Radius Rarity Concussion Grenade: Standard-issue in both the Rebellion and the Empire, the Concussion Grenade disorients and stuns anything which is caught within its blast radius. While it is not designed to kill, it does have a small blast radius which can damage or kill anything caught within it. STATS: 2 Meter Kill Radius 10 Meter Shock Wave Radius Common Thermal detonator: While technically outlawed on every major star system due to its sheer destructive power, it is still found in the hands of Rebels, Imperials, and Bounty Hunters alike. It has a huge blast radius, causing any sentient beings who saw a live detonator pulled out in front of them to run for cover. STATS: 5 Meter Kill Radius 10 Meter Shock Wave Radius Rare VEHICLE LIST: REBELLION: Snowspeeder T2-B T4-B X-Wing EMPIRE: AT-AT AT-ST IFT-T 2-M TIE Fighter TIE Mauler BOTH SIDES: Speederbike VEHICLE STATISTICS: AT-AT (All Terrain Armored Transport): 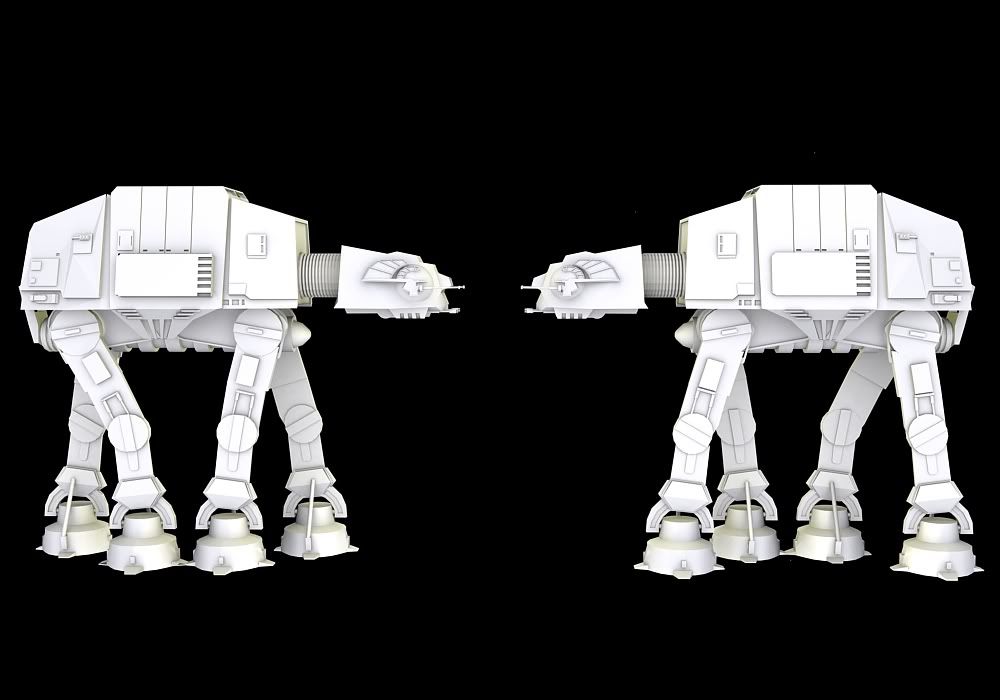  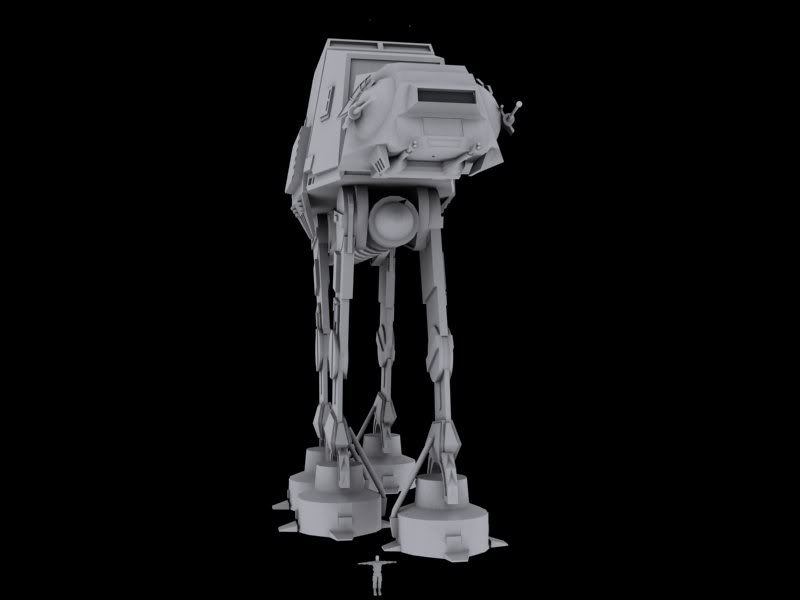 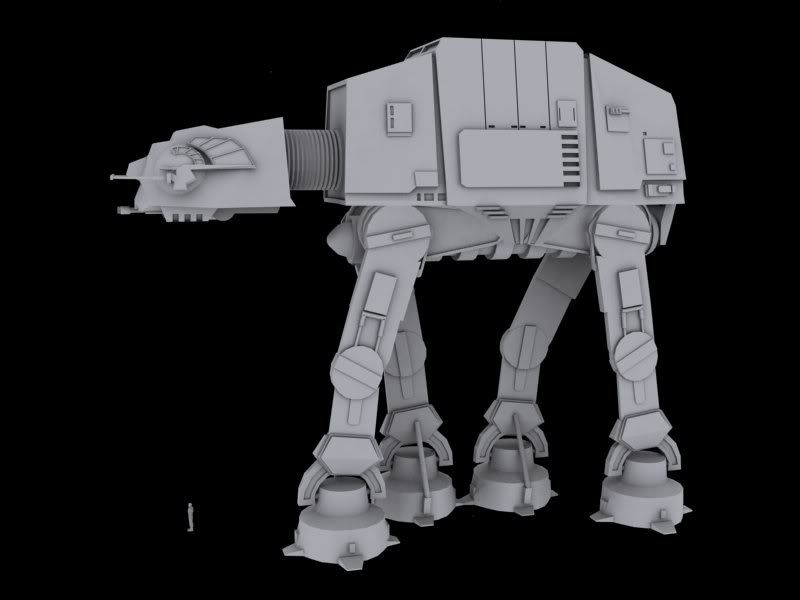 Older Shot demonstrating bay doors: 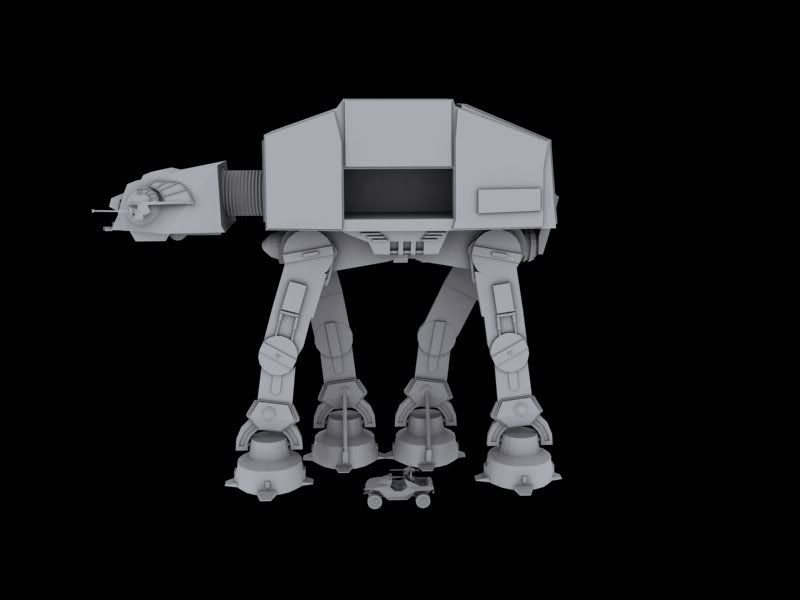 X-Wing: 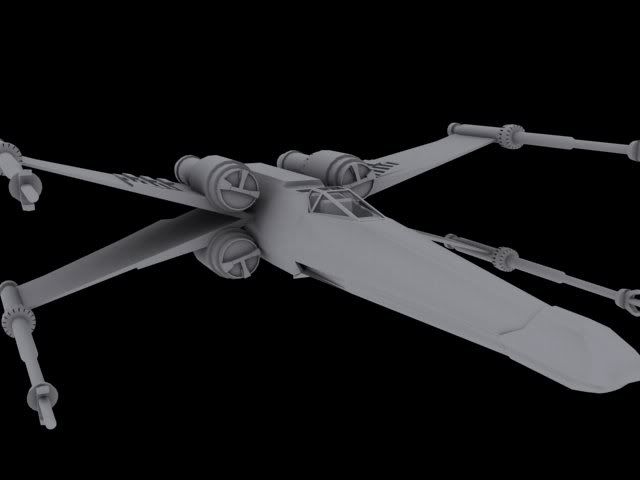  TIE (Twin Ion Engine) Fighter: 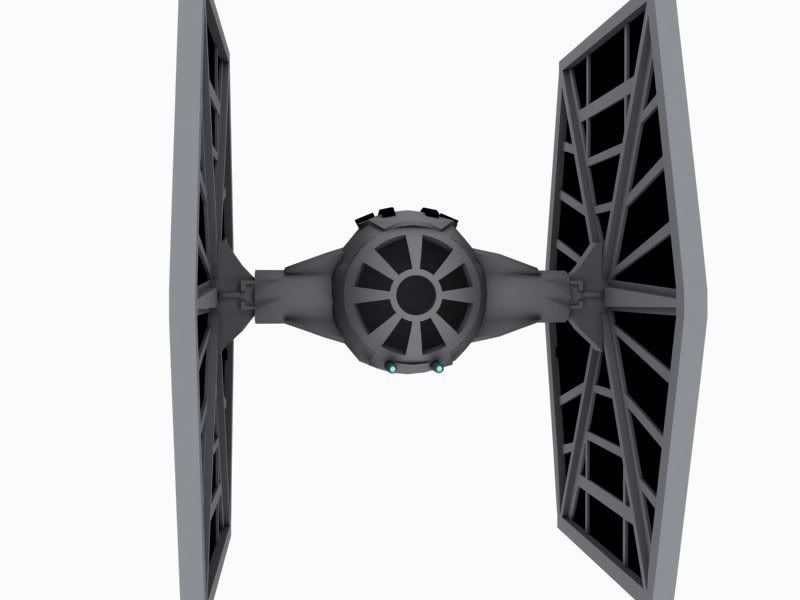 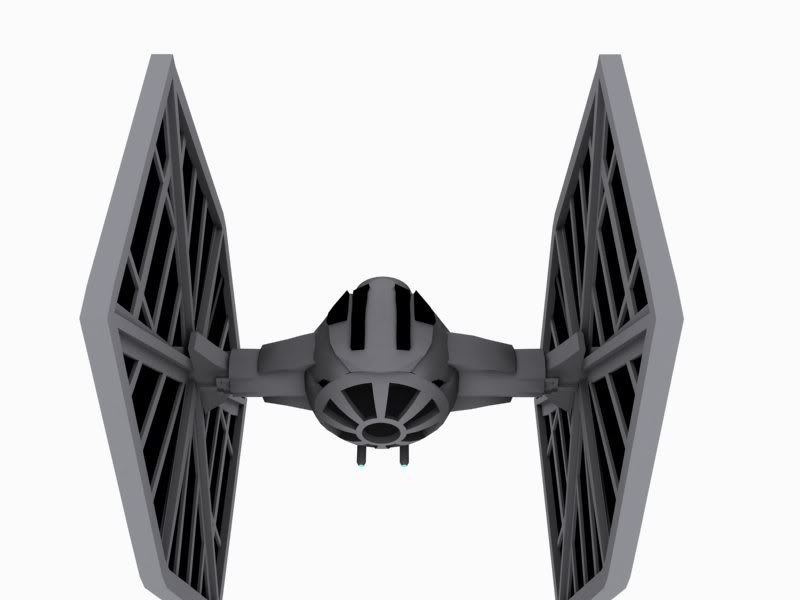 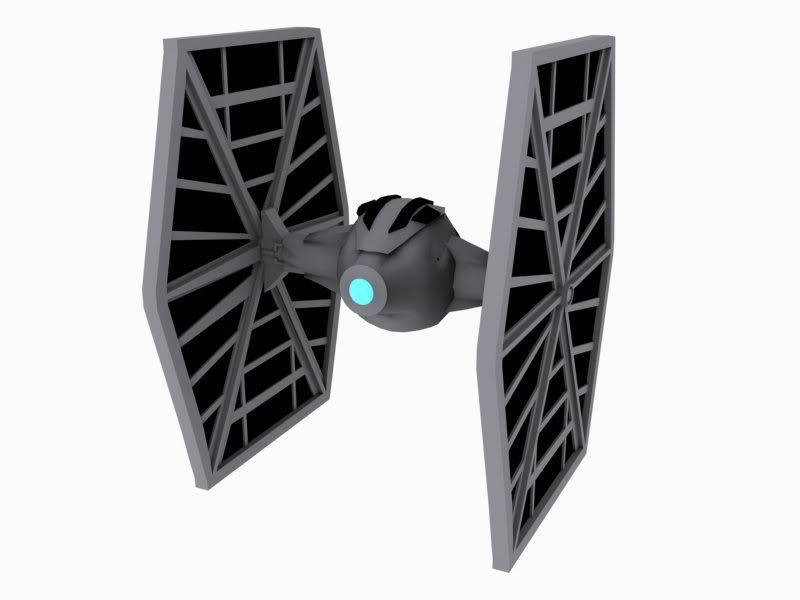 Snowspeeder: 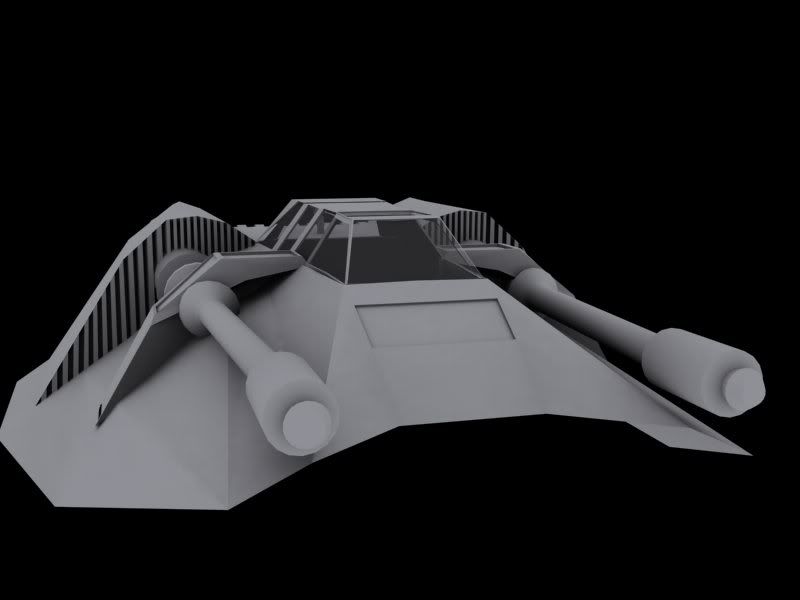 Stormtrooper: 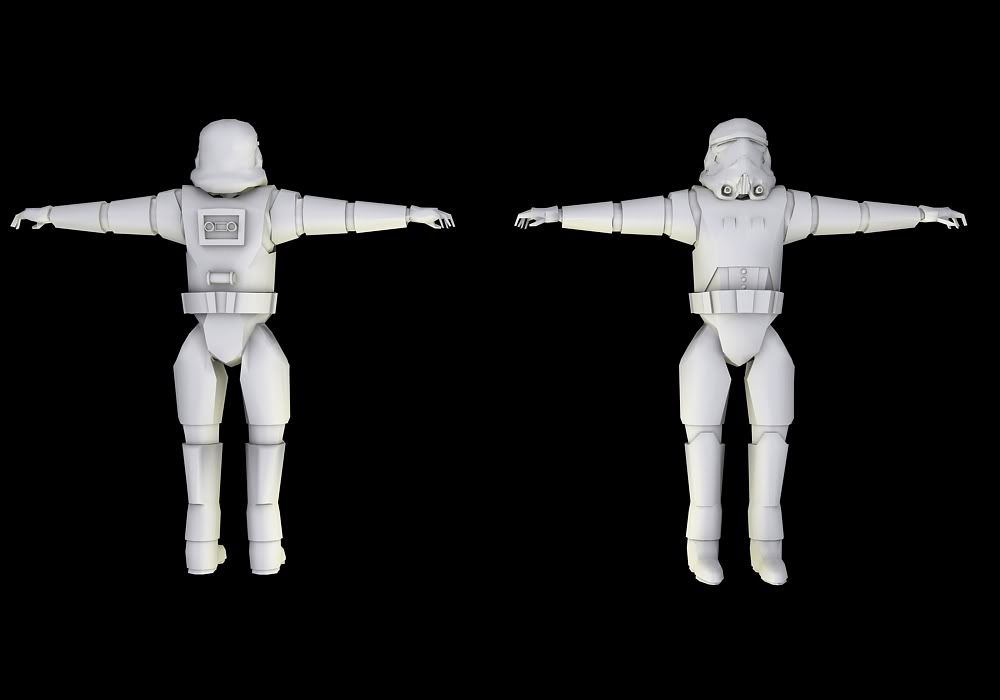 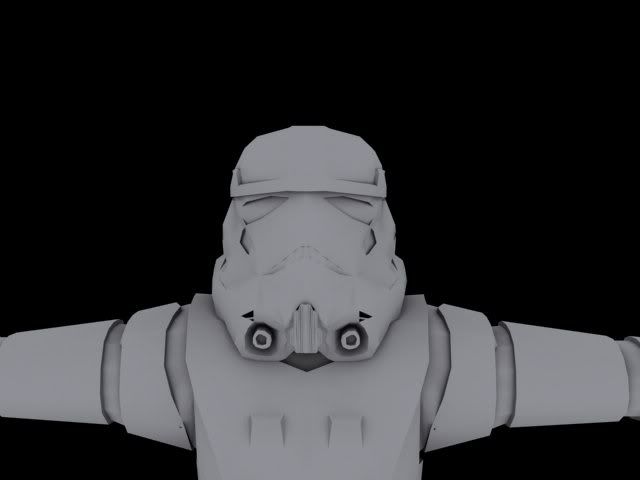 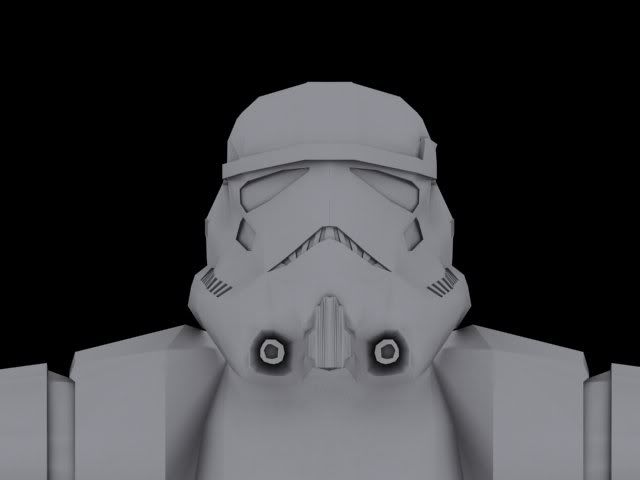 MAP LIST: Tantive IV: Close-Quarters, small size Arc Hammer: Open sight lines, medium size Yavin IV: Varying sight lines, medium size Endor: Close Quarters with open clearings, medium-large size Hoth: Open sight lines, large size Tantive IV: The ship of Princess Leia Organa, the Tantive IV has been in service since the end of the Clone Wars. As part of Operation: SKYHOOK, the Death Star plans were transferred to this ship to be taken to Bail Organa on Alderaan. However, Darth Vader and the 501st have intercepted the ship, captured it, and have boarded the vessel, searching for the plans. As a last-ditch effort as the 501st closed in, Leia put the plans inside the droid R2-D2 and sent him and his counterpart, C3PO, to the surface of Tatooine below. This map is characterized by having narrow hallways that make sharp, 90-degree turns into possible ambushes and multiple choke points at key points along the ship.  Outdated Ingame Shot: 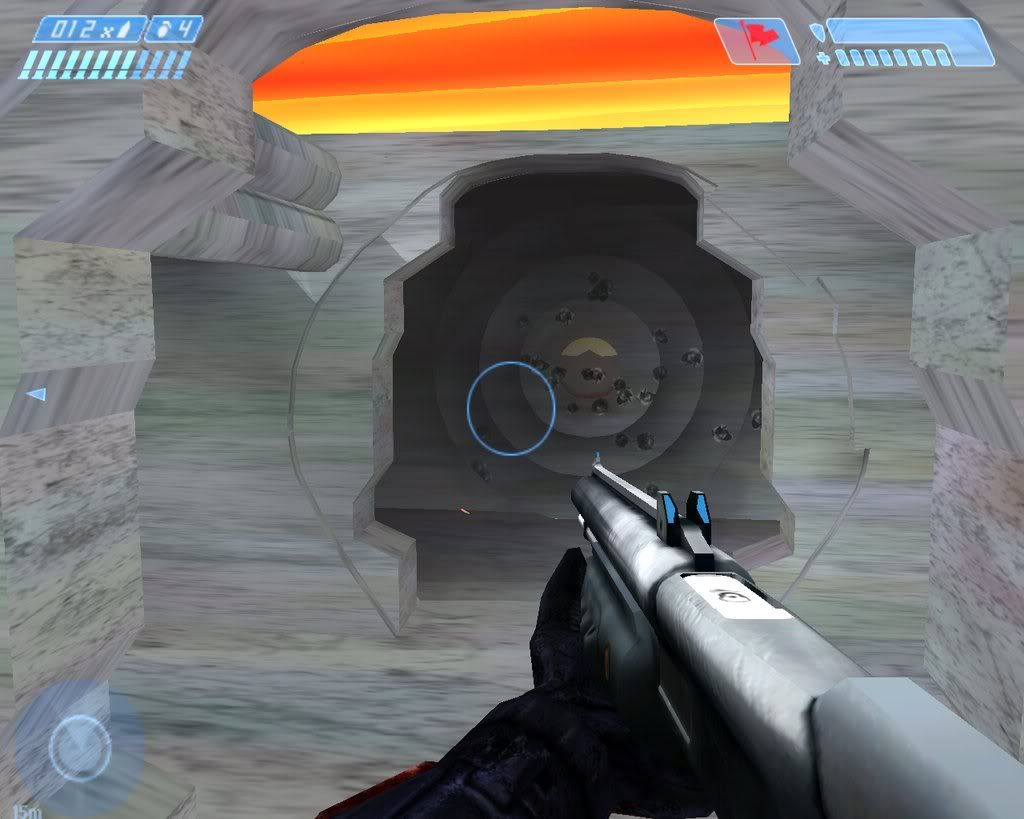 Bulletin Board: 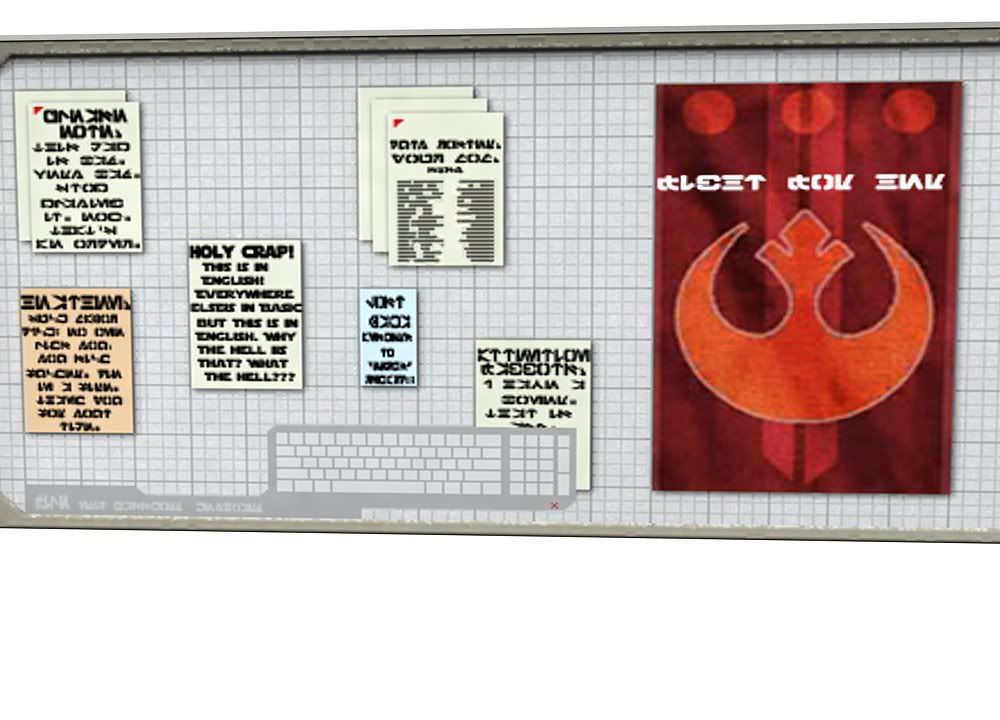 Ingame Video: http://www.youtube.com/watch?v=MepEQVw7_Lk Weapons: A280 Concussion Grenade DH-17 DL-44 E-11 Thermal detonator CR-24 Flame Rifle (2) Power weapons: PLX Missles (1) Flechette Gun (1) Arc Hammer: Kyle Katarn, a mercenary working for the Rebellion, has managed to board a large Imperial factory ship, the Arc Hammer, looking for a way to shut down the Empire's Dark Trooper project. If this "Arc Hammer" ship were to continue to produce the deadly Dark Troopers, the Rebel Alliance will lose the war within weeks. A small Rebel force has secretly infiltrated the Arc Hammer to aid Katarn; however, a large Imperial welcoming party awaits them. This map, taking place in one of the hangars of the Arc Hammer, is full of open sight lines. If a player controls the Sniper located on the catwalk, they can rain death from above. If a player can capture the Assault Cannon guarded by inactive Dark Troopers, they can turn into an unstoppable killing machine, if only for a brief moment. Controlling the map from above is the key to winning on this map. http://www.xfire.com/video/68035/ 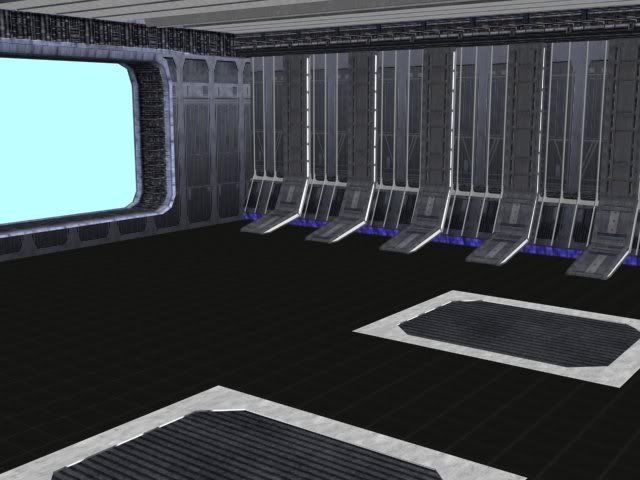 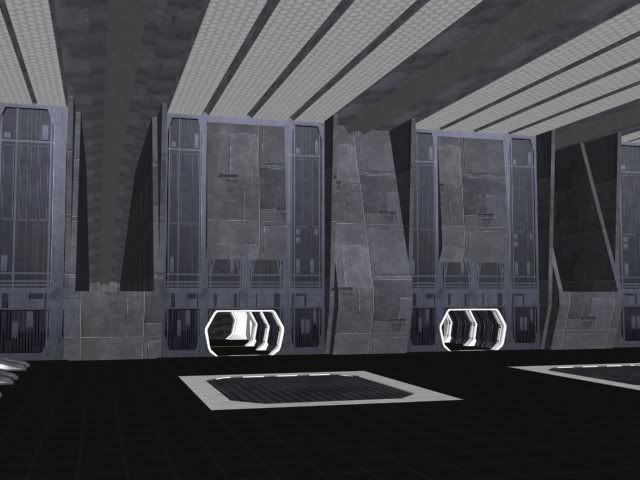 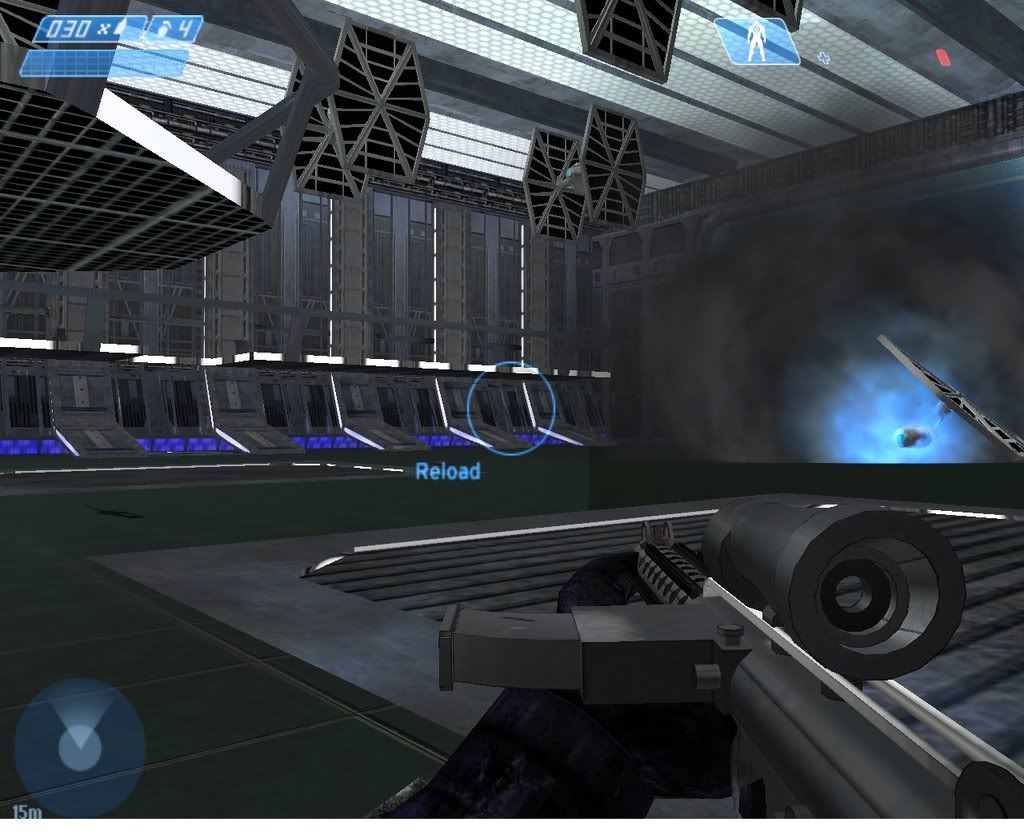 Weapons: A280 Concussion Grenade DH-17 DL-44 E-11 CR-24 Flame Rifle (2) Thermal detonator Power Weapons: Beam Rifle (1) Assault Cannon (1) Yavin IV: Shortly after the destruction of the Death Star, the Imperials retaliated with a full-scale invasion of Yavin IV. Now, the Rebellion forces in the surrounding area have either escaped, been killed, or captured, and the Rebel presense on the planet is reduced to one small temple. The 501st, losing 2/3 of their men in the Death Star's explosion but still a formidable force, now advance on the lone Temple in a box canyon. This medium-range map heavily based off of Blood Gulch has a remarkable balance to it. Neither side has a distinct advantage, and multiple routes lead to tense standoffs and flag captures. 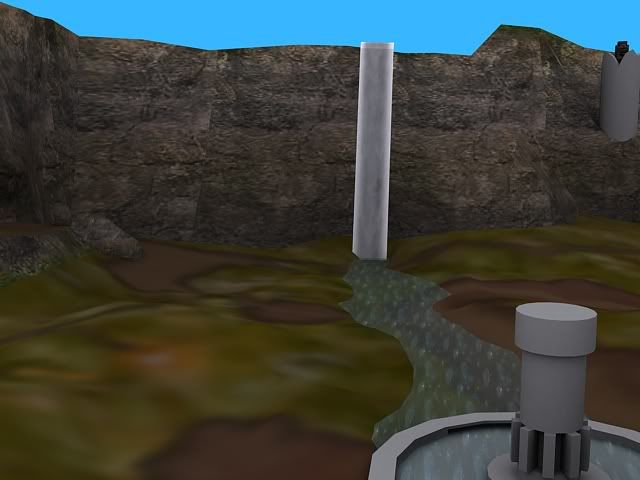 Weapons: A280 Concussion Grenade DH-17 DL-44 E-11 Imperial Heavy Repeater Thermal detonator Power Weapons: PLX Missles (1) CR-24 Flame Rifle (2) Vehicles: T2-B Power Vehicles: T4-B X-Wing EMPIRE: TIE Mauler IFT-T 2-M Power Vehicles: TIE Fighter AT-ST Endor: The Rebellion has located the Second Death Star, still under construction, but cannot attack until the planetary shields are removed. A small force, led by General Han Solo, has infiltrated the planet and made friends with the local Ewoks. Now, they must break into the Shield bunker and set charges in order to prevail over the Empire. Endor, while a large map in appearance, is actually a closer-quarters map with a large open area outside the shield bunker. The Imperials can head south from their position and get inside an AT-AT, which can dominate the open field but cannot get through the thick trees to the Rebel spawn. However, if the AT-AT defense is to be successful, it needs to constantly make sure that all of the many paths into the bunker are guarded at all times, and, due to its size and cumbersome movement, is susceptible to ambushes by Rebel forces. 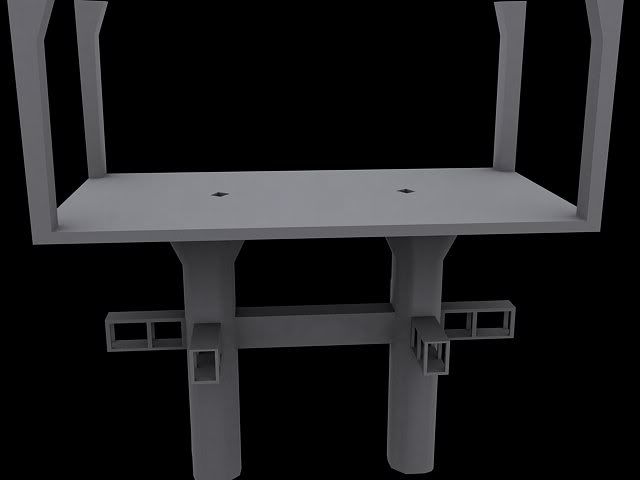 Weapons: A280 Concussion Grenade DH-17 DL-44 E-11 Imperial Heavy Repeater Thermal detonator Power Weapons: Beam Rifle (2) PLX Missles (2) Vehicles: REBELLION: Speederbike (8) EMPIRE: Speederbike (4) AT-ST (2) AT-AT (1) Hoth (Slightly Outdated): The Empire, at long last, has found the Rebel base and is launching their assault with Blizzard Force, a pack of all-powerful AT-ATs. The Rebel base has been alerted and is mobilizing forces to fight the incoming AT-AT assault. While the odds are stacked against the Rebels at first, careful timing of Snowspeeder ambushes can elude the AT-AT's large guns and get into a position where they can take an AT-AT out with little effort. Along with watching for Snowspeeder assaults, AT-AT pilots need to be wary of the many turret emplacements set by Rebellion forces, and of the PLX Missle launchers the Rebels can control fairly quickly. If the Rebellion can stop the AT-AT advance, it is quite possible for them to win this battle. 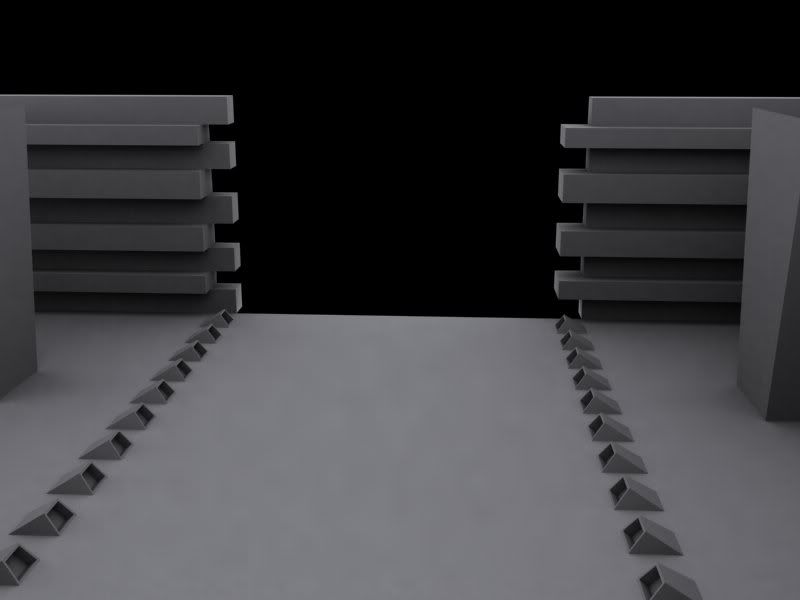 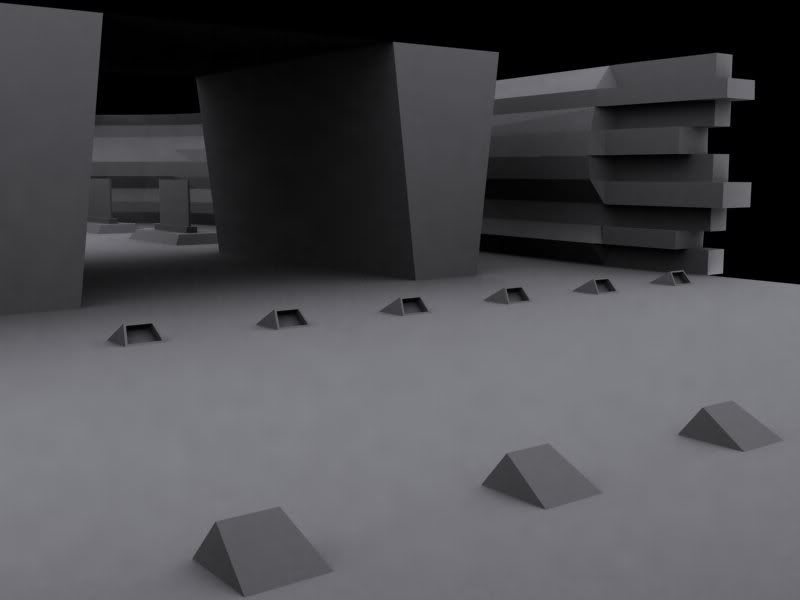 Weapons: A280 Concussion Grenade DH-17 DL-44 E-11 Thermal detonator Imperial Heavy Repeater (4) Power Weapons: PLX Missles (4) Beam Rifle (2) Vehicles: REBELLION: Speederbike (4) Power Vehicles: Snowspeeder (8) EMPIRE: AT-ST (6) Speederbike (4) Power Vehicles: AT-AT (2) SWMT Sidewinder (TESTING/DEMONSTRATION PURPOSES ONLY):        SWMT UI:  Pause Menu:  Postgame Carnage Report:  Team Members: Advancebo Nexus Halo Jay2645 Website: http://starwarsmt.tk/ Other threads: http://forums.filefront.com/halo-modding-editing/371796-swmt-star-wars-mapping- team.html http://www.modacity.net/forums/showthread.php?t=14257 Edited by Jay2645 on Mar 13, 2009 at 02:43 AM |
||||
|
|
|||||
|
OpsY Joined: Feb 19, 2007 
Frobisher Bay |
Posted: Feb 11, 2008 05:46 PM
Msg. 2 of 538
Quote: I ALREADY HAVE A TEAM OF TRUSTED BETA TESTERS, SO DON'T ASK. Put that in red, I can already foresee the nub-flow |
||||
|
|
|||||
|
1800killz Joined: Dec 8, 2007 
|
Posted: Feb 11, 2008 06:05 PM
Msg. 3 of 538
Quote: --- Original message by: ODST Major those look pretty good Welcom ODST major and that does look nice. |
||||
|
|
|||||
|
RougeSpartan414 Joined: Sep 24, 2007 
Angatar, the Iron-Father. |
Posted: Feb 11, 2008 06:32 PM
Msg. 4 of 538
Looks very good. Do you have a general idea of realese? 2008? 2009?
|
||||
|
|
|||||
|
Dennis  Joined: Jan 27, 2005 
"We are made of starstuff.� ― Carl Sagan |
Posted: Feb 11, 2008 06:37 PM
Msg. 5 of 538
Are the walkers intended to be scenery (maybe animated) or vehicles?
|
||||
|
|
|||||
|
RougeSpartan414 Joined: Sep 24, 2007
Angatar, the Iron-Father. |
Posted: Feb 11, 2008 06:39 PM
Msg. 6 of 538
He said they were actual vehicles that you drive/spawn in. You spawn in it by making a script that automaticly places you into a seat when you spawn.
|
||||
|
|
|||||
|
ODX Joined: Jul 26, 2007 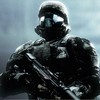
A rare sight, indeed. |
Posted: Feb 11, 2008 06:41 PM
Msg. 7 of 538
Quote: --- Original message by: RougeSpartan414 He said they were actual vehicles that you drive/spawn in. You spawn in it by making a script that automatically places you into a seat when you spawn. So when you get out, do you fall out of it via a side door, or do you just appear on the ground? |
||||
|
|
|||||
|
SiMuLaCrUm Joined: Oct 25, 2006 
too digital |
Posted: Feb 11, 2008 07:34 PM
Msg. 8 of 538
Falling sounds fun heh... better have jetpack on.
|
||||
|
|
|||||
|
Enzo03 - Screenshot Guru - Joined: Aug 3, 2007 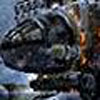
I'd rather go without than take what you'd bring. |
Posted: Feb 11, 2008 07:41 PM
Msg. 9 of 538
Well if it is moving as slow as it is...
it should be made to where it takes so long to get out of the seat that the whole vehicle stops... If done right, you can find yourself right beside the helm of an AT-AT walker. I know this how? because the same goes for the Draco, Longsword, Pelican, and any other vehicle big enough to walk inside of :P. Edited by Enzo03 on Feb 11, 2008 at 07:42 PM |
||||
|
|
|||||
|
Advancebo Joined: Jan 14, 2008 
|
Posted: Feb 11, 2008 08:46 PM
Msg. 10 of 538
Make it so when u get out of it u are on top of it. Then make a ladder down the side of the ATAT
|
||||
|
|
|||||
|
Enzo03 - Screenshot Guru - Joined: Aug 3, 2007
I'd rather go without than take what you'd bring. |
Posted: Feb 11, 2008 08:48 PM
Msg. 11 of 538
Wow. That would be unrealistic.
The only way to be able to do that is make the entire outside of the vehicle like that of a ladder, and yes it is doable. |
||||
|
|
|||||
|
Jay2645 Joined: Mar 29, 2007
Cortana saw you naked. |
Posted: Feb 11, 2008 11:44 PM
Msg. 12 of 538
It IS a vehicle, but it isn't going to be like the Scarab. It will be well-balanced, with many ways to kill it.
The best approach would be shooting at the back of the thing, since it can't turn around all that fast. This would bring it down pretty easily. If you have a lightsaber equipped, then you can go underneath it, then ascend up a cable to the bottom of the AT-AT itself. From here, you cut open a hole, throw in a grenade, then jump down. However, this would be in SP only, since I can't figure out how to balance a Lightsaber. Another would be the classic "Tow Cable" approach. Right now, the system is implemented by having your gunner shoot a tow cable at the legs, and this "sticks" much like the Plasma Grenade. 20 seconds later, the Walker falls. The only bug with this system is that you can fly far away and the thing would still fall, but I can't see a better way to do it. The AT-AT will have big guns (LOOK AT IT, FOR PETE'S SAKE!), but big guns require a lot of power. The primary guns with feature a quick, 2-shot blast, but they can't fire again for 5 seconds, ample time to get away if they missed. The secondary guns also fire a 2-shot blast, with a 8 second recovery time. The secondary guns are far more devastating then the primary, with faster moving projectiles. There are multiple ways out of Echo Base (AKA Red Base), one of which is to just exit through the Hangar area. This is the only Snowspeeder exit, and leads you vulnerable to AT-ATs. You can also exit via 2 different caves, one of which inside the hangar, and one of which directly behind the flag. These take you to the Imperial Landing Site (Blue Base) and the middle of the map, respectively. I'm considering adding in a "Panic Room", similar to Yoyorast Island V2. The hangar will have a switch, which will shut the doors for 1 minute or so, blocking attackers. The Imperials (Blue Team) can still enter through the 2 caves mentioned earlier, and the doors will open if the AT-ATs destroy the Power Generator outside the base. Also, if the generator is destroyed, the doors cannot close. Quote: --- Original message by: ODX Quote: --- Original message by: RougeSpartan414 He said they were actual vehicles that you drive/spawn in. You spawn in it by making a script that automatically places you into a seat when you spawn. So when you get out, do you fall out of it via a side door, or do you just appear on the ground? The walker should stop (IF I can figure out the scripts to get that to happen), then the exit animation is the side doors opening, and the people who are getting out descend down a rope to the ground. As for guns, I'm modifying the Halo guns (You won't be able to tell what they are) with new models, projectiles, I'm making it so they do a bit more damage (3 Shots a kill for the clumsy and hard-to-aim E-11 Blaster Rifle, formerly the Plasma Rifle), but they will have the same rate of fire. They overheat faster, and would require to be reloaded as well, similar to the Flamethrower. And no, unless you're on the team, I won't be taking your models. I don't even think you made that, anyway, lol. Edited by Jay2645 on Feb 11, 2008 at 11:45 PM |
||||
|
|
|||||
|
vmt Joined: Jan 29, 2008 
|
Posted: Feb 12, 2008 08:21 AM
Msg. 13 of 538
nice job but there is already a swmt just so you know and not its not vmt
|
||||
|
|
|||||
|
SonicXtr3me Joined: Jan 13, 2008 
"Wake me when you need me" |
Posted: Feb 12, 2008 10:15 AM
Msg. 14 of 538
so because someone else is doing it , means someone else cannot?
|
||||
|
|
|||||
|
vmt Joined: Jan 29, 2008
|
Posted: Feb 12, 2008 10:36 AM
Msg. 15 of 538
no but im saying starwars mapping team is already a team
|
||||
|
|
|||||
|
Jay2645 Joined: Mar 29, 2007
Cortana saw you naked. |
Posted: Feb 12, 2008 12:58 PM
Msg. 16 of 538
Oh really?
I've never heard of them, never seen anything they've done. Plus I've been working on the SWMT since the days of UMT, which was July-ish. |
||||
|
|
|||||
|
vmt Joined: Jan 29, 2008
|
Posted: Feb 12, 2008 01:01 PM
Msg. 17 of 538
then maybe its you im thinking of im just saying but your work is good
|
||||
|
|
|||||
|
Jay2645 Joined: Mar 29, 2007
Cortana saw you naked. |
Posted: Feb 12, 2008 01:47 PM
Msg. 18 of 538
Well, H2V has been no help on this problem, and I doubt that Halomaps could do any better.
Quote: --- Original message by: Jay2645 Every time I boot up 3DS Max, it loads the splash screen, initializes all the plugins and whatnot, then the splash screen goes away and... No 3DS. Any help? I can't get any more work done until this is fixed. http://www.h2vista.net/forums/showthread.php?p=220676#post220676 Edited by Jay2645 on Feb 12, 2008 at 01:48 PM |
||||
|
|
|||||
|
_TheArbiter_ Joined: Apr 22, 2007 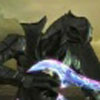
"stupidity is an epidemic " - Donut |
Posted: Feb 12, 2008 04:39 PM
Msg. 19 of 538
uhm jay.....how u "open" a hole in a vehicle?.....the only way would be if u had to open the hole in the same place allways....correct me if im wrong
|
||||
|
|
|||||
|
Jay2645 Joined: Mar 29, 2007
Cortana saw you naked. |
Posted: Feb 12, 2008 05:25 PM
Msg. 20 of 538
There are 2 doors, one on each side of the AT-AT. The doors open whenever someone exits, much like the Scorpion's hatch opening.
|
||||
|
|
|||||
|
ODX Joined: Jul 26, 2007
A rare sight, indeed. |
Posted: Feb 12, 2008 05:29 PM
Msg. 21 of 538
Quote: --- Original message by: Jay2645 There are 2 doors, one on each side of the AT-AT. The doors open whenever someone exits, much like the Scorpion's hatch opening. And then they fall out right? Also, where do the people sit? In there? Because if so, you should make one door be open so people can look out and make sure their driver isn't taking them to their death. |
||||
|
|
|||||
|
_TheArbiter_ Joined: Apr 22, 2007
"stupidity is an epidemic " - Donut |
Posted: Feb 12, 2008 05:30 PM
Msg. 22 of 538
Quote: --- Original message by: Jay2645 If you have a lightsaber equipped, then you can go underneath it, then ascend up a cable to the bottom of the AT-AT itself. From here, you cut open a hole, throw in a grenade, then jump down. However, this would be in SP only, since I can't figure out how to balance a Lightsaber. Edited by Jay2645 on Feb 11, 2008 at 11:45 PM nononono i mean this |
||||
|
|
|||||
|
Jay2645 Joined: Mar 29, 2007
Cortana saw you naked. |
Posted: Feb 12, 2008 05:35 PM
Msg. 23 of 538
Quote: --- Original message by: ODX Quote: --- Original message by: Jay2645 There are 2 doors, one on each side of the AT-AT. The doors open whenever someone exits, much like the Scorpion's hatch opening. And then they fall out right? Also, where do the people sit? In there? Because if so, you should make one door be open so people can look out and make sure their driver isn't taking them to their death. They descend safely down a rope. And there will be no cliffs, so there is no way the driver would take them to their deaths. Quote: --- Original message by: _TheArbiter_ Quote: --- Original message by: Jay2645 If you have a lightsaber equipped, then you can go underneath it, then ascend up a cable to the bottom of the AT-AT itself. From here, you cut open a hole, throw in a grenade, then jump down. However, this would be in SP only, since I can't figure out how to balance a Lightsaber. Edited by Jay2645 on Feb 11, 2008 at 11:45 PM nononono i mean this I'm going to have to fudge it with... INTERESTING camera angles, not showing it directly, but implying that's what's happening. If I have to, I'll make it a cutscene, since it would be in SP. |
||||
|
|
|||||
|
ODX Joined: Jul 26, 2007
A rare sight, indeed. |
Posted: Feb 12, 2008 09:06 PM
Msg. 24 of 538
Quote: --- Original message by: Jay2645
Quote: --- Original message by: ODX Quote: --- Original message by: Jay2645 There are 2 doors, one on each side of the AT-AT. The doors open whenever someone exits, much like the Scorpion's hatch opening. And then they fall out right? Also, where do the people sit? In there? Because if so, you should make one door be open so people can look out and make sure their driver isn't taking them to their death. They descend safely down a rope. And there will be no cliffs, so there is no way the driver would take them to their deaths./quote] *Sigh of relief* Ok, good, but where do they sit? First person looking out a door like I said or something else? Also, would sliding down a rope while the AT-AT is still moving sync? I should think so, because getting out of warthogs and tanks does even when the driver is still moving.... |
||||
|
|
|||||
|
RougeSpartan414 Joined: Sep 24, 2007
Angatar, the Iron-Father. |
Posted: Feb 12, 2008 09:10 PM
Msg. 25 of 538
Random qoute for no reason?
Will the layout of the map be like BattleFront, or a custom layout? |
||||
|
|
|||||
|
HDoan Joined: Feb 19, 2007 
"'Tis only happens to them Asians" - ODX 2008 |
Posted: Feb 12, 2008 09:15 PM
Msg. 26 of 538
Cani rigs?
|
||||
|
|
|||||
|
Jay2645 Joined: Mar 29, 2007
Cortana saw you naked. |
Posted: Feb 13, 2008 11:59 PM
Msg. 27 of 538
Quote: --- Original message by: ODX Quote: --- Original message by: Jay2645 Quote: --- Original message by: ODX Quote: --- Original message by: Jay2645 There are 2 doors, one on each side of the AT-AT. The doors open whenever someone exits, much like the Scorpion's hatch opening. And then they fall out right? Also, where do the people sit? In there? Because if so, you should make one door be open so people can look out and make sure their driver isn't taking them to their death. They descend safely down a rope. And there will be no cliffs, so there is no way the driver would take them to their deaths. *Sigh of relief* Ok, good, but where do they sit? First person looking out a door like I said or something else? Also, would sliding down a rope while the AT-AT is still moving sync? I should think so, because getting out of warthogs and tanks does even when the driver is still moving.... Yes, it syncs. It's in 3rd person, so you can actually see where you are going. Think of the Mythos' passenger seats. Now, while they get OUT via a rope, they get in by magic. No, wait, they... errm... "Use the Force". Yeah. That's it. Let's go with that. The only exception to this rule is the driver, who has to get in the AT-AT from a special hill by the spawn points. If the driver abandons his AT-AT in the middle of the Battlefield, he has quite a predicament. First off, if he jumps out of the newly-opened hatches (They are open when the AT-AT is vacant), he would die or be seriously injured from the fall. Second off, if the AT-AT sits there for 30 seconds, it respawns, leaving him in mid-air. He would die from this, too. Quote: --- Original message by: RougeSpartan414 Random qoute for no reason? Will the layout of the map be like BattleFront, or a custom layout? I have a custom layout in mind. It'll be about the same size as Battlefront's, though. I have 3 different entrances to the Rebel base, compared to Battlefront's 2. I also have an extra area behind Echo base (You DO see it in Battlefront II's SP, but it is only in Hunt mode on MP) where the Flag is stored. I am implementing my stole- I mean "borrowed" Yoyorast Island V2-ish Panic Room idea for the hangar, sealing off the base for a minute or so from attackers. Again, the doors will re-open after a minute is up or if the Power Generator is destroyed. They can be shut again 2 minutes after being opened. Quote: --- Original message by: HDoan Cani rigs? Yes, you can rigs. However, my 3DS Max is down right now, I'm still trying to fix it. When I get it working again, I'll get you some Rebels to rig. Before you guys shout out "HE DIDN'T SHOW ANY WORK!", I am aware of what HDoan has made, so he's an exception to the rule. For the main guns, it would take a direct hit to kill you - No splash damage. This is hard to do for infantry from an AT-AT, but for larger targets (Snowspeeders, Power Generators, etc.) which would require more than one hit to bring down, these would be the gun of choice. The secondary guns have splash damage. These are the deadliest part of an AT-AT, because it's essentially the same gun as the tank's primary weapon, but with a different model and different firing effects. However, these take a long time to cool off, a full 8 seconds between shots. This is ample opportunity to escape after a missed shot. I'm not going to make the AT-AT a noob vehicle. It has plenty of weaknesses to exploit. In fact, I'm aiming to make it less noobish than a tank, which is a far-off goal to reach, I know, but I'll still try. |
||||
|
|
|||||
|
Kiwi Joined: Jan 19, 2007 
Now you see him, soon you won't |
Posted: Feb 14, 2008 07:16 AM
Msg. 28 of 538
Seems to too slow a firing rate if it takes 2 shots to take out a snowspeeder.
|
||||
|
|
|||||
|
RougeSpartan414 Joined: Sep 24, 2007
Angatar, the Iron-Father. |
Posted: Feb 14, 2008 03:38 PM
Msg. 29 of 538
Hopefully there will be turrets to take out that problem.
|
||||
|
|
|||||
|
hailstorm65 Joined: May 25, 2007 
Gamertag- Soviet Vodka |
Posted: Feb 14, 2008 03:50 PM
Msg. 30 of 538
So are you sure that you will make an sp for this?
|
||||
|
|
|||||
|
Jay2645 Joined: Mar 29, 2007
Cortana saw you naked. |
Posted: Feb 14, 2008 08:50 PM
Msg. 31 of 538
Quote: --- Original message by: hailstorm65 So are you sure that you will make an sp for this? I'll have to see how it's received. Quote: --- Original message by: RougeSpartan414 Hopefully there will be turrets to take out that problem. There are some turrets, yes. I'll cover these as it comes up. Quote: --- Original message by: Kiwi Seems to too slow a firing rate if it takes 2 shots to take out a snowspeeder. I don't want it to be a noobish weapon. Though a few Snowspeeders WILL get through, a tight offensive will keep them from doing too much damage. Edited by Jay2645 on Feb 14, 2008 at 09:43 PM |
||||
|
|
|||||
|
Mythic128 Joined: Jan 1, 2008 
-Account Locked- |
Posted: Feb 14, 2008 09:45 PM
Msg. 32 of 538
Quote: --- Original message by: SPARTAN04 die rebel scumb....I can lend you darthvader:  xfire: laxattck74 lol. |
||||
|
|
|||||
|
Kiwi Joined: Jan 19, 2007
Now you see him, soon you won't |
Posted: Feb 15, 2008 09:14 AM
Msg. 33 of 538
Quote: --- Original message by: Jay2645 Quote: --- Original message by: Kiwi Seems to too slow a firing rate if it takes 2 shots to take out a snowspeeder. I don't want it to be a noobish weapon. Though a few Snowspeeders WILL get through, a tight offensive will keep them from doing too much damage. Edited by Jay2645 on Feb 14, 2008 at 09:43 PM Perhaps 2 shots from the primary weapon before a 7 second reload? |
||||
|
|
|||||
|
Jay2645 Joined: Mar 29, 2007
Cortana saw you naked. |
Posted: Feb 15, 2008 10:58 PM
Msg. 34 of 538
There are dual chin cannons, which fire 2 shots per click (Not simultaneously, think of the timing of being something like pew-pew). Then you will wait 5 seconds before firing another shot. If a Snowspeeder catches both of them, it's down.
|
||||
|
|
|||||
|
HogdriverOneFiveFive Joined: Dec 21, 2007 
Prodigal Son Returns-Actual Join Date April, 2006. |
Posted: Feb 15, 2008 11:07 PM
Msg. 35 of 538
how slow will it walk? compare to mythos... lol if you fly under a scarab with a peli you can flip it and it glitches EVERYWHERE ahahahahaha.
|
||||
|
|
|||||
| Page 1 of 16 | Go to page: · [1] · 2 · 3 · 4 · 5 · 6 · 7 · 8 · ... · 16 · Next |

|