A Community discussion forum for Halo Custom Edition, Halo 2 Vista, Portal and Halo Machinima
|
| »Forums Index »Halo Custom Edition (Bungie/Gearbox) »Halo CE General Discussion »How do you rig weapons? | 
|
| Author | Topic: How do you rig weapons? (24 messages, Page 1 of 1) | ||||
| Moderators: Dennis | |||||
|
Spartan314 Joined: Aug 21, 2010 
Former biped rigger & FP animator |
Posted: Jun 20, 2011 04:17 AM
Msg. 1 of 24
Need to rig a weapon. (DMR and Plasma Launcher.)
Haven't come across any. All I've seen are model rigging kits. And biped rigging tutorials. Or... do I use biped rigs to make sure the biped holds the weapon correctly? Just need a nudge in the right direction. |
||||
|
|
|||||
|
rerout343 Joined: Aug 7, 2010 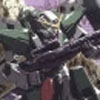
Targeted and Firing |
Posted: Jun 20, 2011 07:44 AM
Msg. 2 of 24
I usually just import a stock weapon(one that uses similar animations to yours) and use that as a guide.
|
||||
|
|
|||||
|
UBE Chief Joined: Sep 28, 2009 
Raising the bar, one kill at a time. |
Posted: Jun 20, 2011 08:52 AM
Msg. 3 of 24
You be quiet, that's not helping.
|
||||
|
|
|||||
|
milkkookie Joined: Aug 10, 2010 
:) |
Posted: Jun 20, 2011 10:42 AM
Msg. 4 of 24
select and detach all the moving parts of the weapon (take the gun apart) . and make individual nodes for them. link the nodes to correct detached part of the weapon. ex: linking the frame magazine to the actual model of the magazine. then just link all the nodes and markers to the frame gun node. the frame gun node is place where you want the players right hand to be( fp). at the end you should have a bunch of different models each linked to a specific node.
Edited by milkkookie on Jun 20, 2011 at 10:49 AM |
||||
|
|
|||||
|
ODX Joined: Jul 26, 2007 
A rare sight, indeed. |
Posted: Jun 20, 2011 12:04 PM
Msg. 5 of 24
Quote: --- Original message by: milkkookie Other way around: you link the magazine itself to frame magazine, and so on with the rest.ex: linking the frame magazine to the actual model of the magazine. |
||||
|
|
|||||
|
teh lag Joined: May 6, 2008 
|
Posted: Jun 20, 2011 02:21 PM
Msg. 6 of 24
"Rigging" weapons isn't really a... thing. Maybe if you're doing some funky thing with hoses or other bend-y parts you need to use one of those "rigging" tools, but 99% of the time you just need to link stuff to frames/nodes, as has been mentioned above.
...However, for the sake of being helpful I'm going to put that aside and explain some stuff, which is what I imagine you expected. Weapons are in fact a little odd especially when it comes to making FP models work with other FP animations. There are also a few misconceptions that I'd like to clear up here. For the purposes of this explanation, I'm going to assume you know about node hierarchy (all nodes must have a parent node except for one "root" node) and that you link geometry and markers to nodes. Also remember that markers are not nodes (some people get them confused believe it or not.) Nodes let things move; markers are just points on a model that are used for assorted stuff. Nodes must have names that begin with "frame " (space included) and markers begin with "#". (Technically nodes can also begin with "bip01 " but that doesn't really apply here... honestly if you write your own exporter they can be called anything but that doesn't apply here either). First: Setting up a weapon for third-person. There are a few rookie mistakes that can lead to your weapon looking/behaving oddly, and a few (well... one) super-easy way to avoid them. What I always do when setting up a weapon's model for 3p is import an existing weapon's 3p nodes and markers. There are a few markers in particular - "ground point", "left hand cyborg", "left hand marine", etc - which are both important (they determine the angle a weapon rests at on the ground and where the character's other hand grips the gun respectively) and easy to screw up (since it can be a serious pain to find an orientation for them that looks correct - the game doesn't just magically know which way something should be rotated, you need to physically rotate the marker to indicate it).  (Figure A: the Sniper Rifle's nodes and markers, with some unneeded nodes removed) In general, what you really need above all else is the "frame gun" node (and it doesn't even *need* to be "frame gun" - that's just a convention) and for the weapon's "primary" gripping area to be at 0,0,0. Frame gun does not necessarily have to be at 0,0,0 - in fact many of the weapons in the game have it somewhere else. However, that is where the game will place the gun relative to a character's gripping hand, so you must have the grip or whatever be at the center of the scene. And of course, as has been stated earlier, make sure that all of your geometry is linked to a node, otherwise it won't get exported!  (Figure B: A model that has been positioned to use the Sniper Rifle's 3p setup, with some markers rearranged or added. Notice how the frame in the scene is not at 0,0,0) A special note that illustrates a special point: the Flamethrower is weird. The Cyborg's 3p animations for the flamethrower have the right hand turned down roughly 50 degrees so that it looks better when gripping the back of the weapon; thus any weapon that will use the flamethrower's 3p animations must be rotated up by roughly 50 degrees to match it. This is very annoying (and in fact I didn't even bother with it for my Elites - hence why you need to use an edited Flamethrower model) but alas, that's how it is. Unless otherwise specified in a biped's animation tag (which is a whole other issue I won't dare to get into now), a weapon model is placed so that 0,0,0 in the model is positioned and rotated to match up with the biped's weapon grip marker.  (Figure C: The flamethrower's 3p model; notice how it is tilted up to match the Cyborg's hand which was animated to be tilted down) And one more special note: collision models. Though technically not part of "rigging" a weapon, I still want to cover this since I've found myself writing a full-length tutorial on the process of getting weapon models all neatly in-game, and this is definitely the kind of thing that you want to have. Making a collision model for your weapon can be accomplished in 5 easy steps: 1) Delete your weapon's markers, collision models don't need them 2) Create a box that roughly covers the shape of your weapon, and assign it some material. 3) Edit the box's vertices as necessary to minimize uncovered space (or space that is covered but has no model geometry) 4) Delete your weapon's render geometry, leaving only the box and node(s) 5) Link your box to the base frame, save as a new file and export to your weapon's "physics" folder as a .jms file. You can now compile it into a collision tag and do whatever with it!   (Figure D: a box is created around the model and edited to fit. All markers and render geometry are deleted and you are left with a clean, simple, small model that serves as your weapon's collision geometry) Lastly, there's the potential issue of 3p animations for a weapon tag. 99% of the time you will not need any unless you're super dead-set on attention to detail. These are used for things like the shotgun's pump moving in 3p and not much else. I'm going to assume that if you're making something that requires moving parts on the weapon in 3p, you know what you're doing and can handle it yourself. Now, onto the magical world of FP weapons... This is where it gets really weird. The game's FP system involves merging the FP arms and weapon model into one and then applying a single animation setup to the both of them. as a result of this, it's possible to get away with a bit more than you usually can, but it's also really easy to shoot yourself in the foot and have a long, hard, annoying road ahead of you consisting of trial-and-error fixing of assorted crap. For the purposes of this explanation I'm going to assume that you're trying to set up a weapon to use existing animations; even if you're not it doesn't really matter. All that changes is you're allowed to create your own nodes and move existing ones around (more on that later). So, let's start with some weapon we want to put in-game using some pre-existing animations.  (Figure A1: some weapon - notice how I have markers but no nodes; this is important) The first step of this process is to find some other weapon that already has animations that will roughly fit over this one - in particular you want key parts (the magazine, he hand grip areas, etc) to more or less match up so it looks decent in-game. Then, make sure that your existing custom model has no nodes in it (this is important). Then, you want to import that weapon's model and nodes only into the scene with your custom model. (Don't import the markers unless you want to re-use them as was done in the 3p section; you can make markers all you want). Now, move either your custom model and its markers or the original and its nodes so that the two models line up at the aforementioned key parts. It is very important that you do not move any of the nodes aside from the root node (frame gun or its equivalent). You will almost certainly cause problems for yourself, as it is necessary that the node structure stay identical. You may do re-scaling, but only with the markers and your custom geometry - since scaling the nodes will, of course, cause them to move around which we can't have.  (Figure B1: matched up.... close enough) Now, delete the original's geometry, leaving only your model, any markers you have, and the nodes of the original. You the need to link the geometry/markers to their appropriate nodes - but once again do not move the nodes. Here is why: no matter where you move the nodes, they will be moved back to their original positions when they are animated, and any geometry linked to them after they have been moved will be moved back as well. This will cause horrible, horrible problems, as you might find parts of the gun moved to places where they shouldn't ever be. Even though the game can (and usually will) accept your FP model and have it show up in-game if you have moved nodes around, unless you're very lucky you will find that things don't look quite the way you expect them to. By preserving all of the nodes' relative positions, you ensure that things will look exactly in-game as they do in 3ds, while still having parts of the gun linked to the appropriate node. And again, as with the 3p model, frame gun does not necessarily have to be at 0,0,0. As with the 3p model, many of the stock models have it off somewhere in the center of the gun (for example the shotgun). Just make sure that the new model's geometry lines up with the old geometry and you'll be fine. Here's the other thing: you may not add any extra nodes. If there isn't a node for something that you need to have moving on your custom gun, you're out of luck and you need to find something else to link it to. This is because the game cannot match a node in the new model to one that doesn't exist in the old animations. (Interestingly, it's fine if you delete a node with no children in the new model - I'm not quite sure why this works, but you can try it yourself: something with only some of the nodes of the original will usually still show up in FP as long as they all have the same linking-heirarchy).  (Figure C1: Just the new geometry and markers + the old nodes... with none of them moved around. Notice how "frame bolt" isn't anywhere near the bolt - it might look a bit strange in-game if the hand touches the bolt, but it'll look even weirder if I move the node to be near the actual bolt geometry. It'll just get offset back to where it was before, except with the new geometry along with it!) On the other hand, if you are going to be making your own animations for the weapon, you can go hog-wild with nodes and move them around or add them all you want, since you'll have your own animations. Just make sure that everything that isn't a node is linked to a node, and every node is linked to a parent node (except, of course, the lone root node such as "frame gun"). There's nothing scary about this anymore... all that can really go wrong is if you forget to link something to a parent, or if you scale a node. Don't ever scale your nodes, that's asking for trouble like you wouldn't believe.  (Figure D1: If I know I'll have custom animations, I'll revise the node positions to be a bit more logical and add them where they're needed) And there you have it. To reiterate a few points: 3p: -Frame gun doesn't have to be at 0,0,0; however in 3p your model's main grip does --As the Flamethrower illustrates, the gun is in fact positioned with 0,0,0 representing the position + orientation of the grip hand -For a 3p model, if you're not sure what to do import an existing model's nodes + markers and adjust them as you see fit FP: -If you want to make a new model work with old FP animations you must use exactly the old one's node setup; do not move old nodes or create new ones. -Even if you're making custom animations, don't scale your nodes!!!!!!! -Make sure the key points of the geometry more or less line up; if they don't you should consider custom animations (or at the very least, editing existing ones). -Do whatever you want with markers. One super-final note: be sure you fp model has a flashlight marker!! Otherwise the flashlight will look strange!!! In the end, all it really is is linking geometry and markers to nodes if you want them to move. I'm done. Questions? Edited by teh lag on Jun 20, 2011 at 02:32 PM |
||||
|
|
|||||
|
UBE Chief Joined: Sep 28, 2009
Raising the bar, one kill at a time. |
Posted: Jun 20, 2011 10:04 PM
Msg. 7 of 24
Get out while you're ahead.
|
||||
|
|
|||||
|
IcePhoenix Joined: Sep 9, 2010 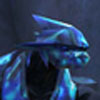
-Minor modeler- |
Posted: Jun 21, 2011 04:41 AM
Msg. 8 of 24
You just depleted my source of motivation. I am sure as hell NEVER gonna try rigging anything!
|
||||
|
|
|||||
|
Nickster5000 Joined: Dec 11, 2010 
|
Posted: Jun 21, 2011 04:57 AM
Msg. 9 of 24
Quote: --- Original message by: teh lag "Rigging" weapons isn't really a... thing. Maybe if you're doing some funky thing with hoses or other bend-y parts you need to use one of those "rigging" tools, but 99% of the time you just need to link stuff to frames/nodes, as has been mentioned above. ...However, for the sake of being helpful I'm going to put that aside and explain some stuff, which is what I imagine you expected. Weapons are in fact a little odd especially when it comes to making FP models work with other FP animations. There are also a few misconceptions that I'd like to clear up here. For the purposes of this explanation, I'm going to assume you know about node hierarchy (all nodes must have a parent node except for one "root" node) and that you link geometry and markers to nodes. Also remember that markers are not nodes (some people get them confused believe it or not.) Nodes let things move; markers are just points on a model that are used for assorted stuff. Nodes must have names that begin with "frame " (space included) and markers begin with "#". (Technically nodes can also begin with "bip01 " but that doesn't really apply here... honestly if you write your own exporter they can be called anything but that doesn't apply here either). First: Setting up a weapon for third-person. There are a few rookie mistakes that can lead to your weapon looking/behaving oddly, and a few (well... one) super-easy way to avoid them. What I always do when setting up a weapon's model for 3p is import an existing weapon's 3p nodes and markers. There are a few markers in particular - "ground point", "left hand cyborg", "left hand marine", etc - which are both important (they determine the angle a weapon rests at on the ground and where the character's other hand grips the gun respectively) and easy to screw up (since it can be a serious pain to find an orientation for them that looks correct - the game doesn't just magically know which way something should be rotated, you need to physically rotate the marker to indicate it). (Figure A: the Sniper Rifle's nodes and markers, with some unneeded nodes removed) In general, what you really need above all else is the "frame gun" node (and it doesn't even *need* to be "frame gun" - that's just a convention) and for the weapon's "primary" gripping area to be at 0,0,0. Frame gun does not necessarily have to be at 0,0,0 - in fact many of the weapons in the game have it somewhere else. However, that is where the game will place the gun relative to a character's gripping hand, so you must have the grip or whatever be at the center of the scene. And of course, as has been stated earlier, make sure that all of your geometry is linked to a node, otherwise it won't get exported! (Figure B: A model that has been positioned to use the Sniper Rifle's 3p setup, with some markers rearranged or added. Notice how the frame in the scene is not at 0,0,0) A special note that illustrates a special point: the Flamethrower is weird. The Cyborg's 3p animations for the flamethrower have the right hand turned down roughly 50 degrees so that it looks better when gripping the back of the weapon; thus any weapon that will use the flamethrower's 3p animations must be rotated up by roughly 50 degrees to match it. This is very annoying (and in fact I didn't even bother with it for my Elites - hence why you need to use an edited Flamethrower model) but alas, that's how it is. Unless otherwise specified in a biped's animation tag (which is a whole other issue I won't dare to get into now), a weapon model is placed so that 0,0,0 in the model is positioned and rotated to match up with the biped's weapon grip marker. (Figure C: The flamethrower's 3p model; notice how it is tilted up to match the Cyborg's hand which was animated to be tilted down) And one more special note: collision models. Though technically not part of "rigging" a weapon, I still want to cover this since I've found myself writing a full-length tutorial on the process of getting weapon models all neatly in-game, and this is definitely the kind of thing that you want to have. Making a collision model for your weapon can be accomplished in 5 easy steps: 1) Delete your weapon's markers, collision models don't need them 2) Create a box that roughly covers the shape of your weapon, and assign it some material. 3) Edit the box's vertices as necessary to minimize uncovered space (or space that is covered but has no model geometry) 4) Delete your weapon's render geometry, leaving only the box and node(s) 5) Link your box to the base frame, save as a new file and export to your weapon's "physics" folder as a .jms file. You can now compile it into a collision tag and do whatever with it! (Figure D: a box is created around the model and edited to fit. All markers and render geometry are deleted and you are left with a clean, simple, small model that serves as your weapon's collision geometry) Lastly, there's the potential issue of 3p animations for a weapon tag. 99% of the time you will not need any unless you're super dead-set on attention to detail. These are used for things like the shotgun's pump moving in 3p and not much else. I'm going to assume that if you're making something that requires moving parts on the weapon in 3p, you know what you're doing and can handle it yourself. Now, onto the magical world of FP weapons... This is where it gets really weird. The game's FP system involves merging the FP arms and weapon model into one and then applying a single animation setup to the both of them. as a result of this, it's possible to get away with a bit more than you usually can, but it's also really easy to shoot yourself in the foot and have a long, hard, annoying road ahead of you consisting of trial-and-error fixing of assorted crap. For the purposes of this explanation I'm going to assume that you're trying to set up a weapon to use existing animations; even if you're not it doesn't really matter. All that changes is you're allowed to create your own nodes and move existing ones around (more on that later). So, let's start with some weapon we want to put in-game using some pre-existing animations. (Figure A1: some weapon - notice how I have markers but no nodes; this is important) The first step of this process is to find some other weapon that already has animations that will roughly fit over this one - in particular you want key parts (the magazine, he hand grip areas, etc) to more or less match up so it looks decent in-game. Then, make sure that your existing custom model has no nodes in it (this is important). Then, you want to import that weapon's model and nodes only into the scene with your custom model. (Don't import the markers unless you want to re-use them as was done in the 3p section; you can make markers all you want). Now, move either your custom model and its markers or the original and its nodes so that the two models line up at the aforementioned key parts. It is very important that you do not move any of the nodes aside from the root node (frame gun or its equivalent). You will almost certainly cause problems for yourself, as it is necessary that the node structure stay identical. You may do re-scaling, but only with the markers and your custom geometry - since scaling the nodes will, of course, cause them to move around which we can't have. (Figure B1: matched up.... close enough) Now, delete the original's geometry, leaving only your model, any markers you have, and the nodes of the original. You the need to link the geometry/markers to their appropriate nodes - but once again do not move the nodes. Here is why: no matter where you move the nodes, they will be moved back to their original positions when they are animated, and any geometry linked to them after they have been moved will be moved back as well. This will cause horrible, horrible problems, as you might find parts of the gun moved to places where they shouldn't ever be. Even though the game can (and usually will) accept your FP model and have it show up in-game if you have moved nodes around, unless you're very lucky you will find that things don't look quite the way you expect them to. By preserving all of the nodes' relative positions, you ensure that things will look exactly in-game as they do in 3ds, while still having parts of the gun linked to the appropriate node. And again, as with the 3p model, frame gun does not necessarily have to be at 0,0,0. As with the 3p model, many of the stock models have it off somewhere in the center of the gun (for example the shotgun). Just make sure that the new model's geometry lines up with the old geometry and you'll be fine. Here's the other thing: you may not add any extra nodes. If there isn't a node for something that you need to have moving on your custom gun, you're out of luck and you need to find something else to link it to. This is because the game cannot match a node in the new model to one that doesn't exist in the old animations. (Interestingly, it's fine if you delete a node with no children in the new model - I'm not quite sure why this works, but you can try it yourself: something with only some of the nodes of the original will usually still show up in FP as long as they all have the same linking-heirarchy). (Figure C1: Just the new geometry and markers + the old nodes... with none of them moved around. Notice how "frame bolt" isn't anywhere near the bolt - it might look a bit strange in-game if the hand touches the bolt, but it'll look even weirder if I move the node to be near the actual bolt geometry. It'll just get offset back to where it was before, except with the new geometry along with it!) On the other hand, if you are going to be making your own animations for the weapon, you can go hog-wild with nodes and move them around or add them all you want, since you'll have your own animations. Just make sure that everything that isn't a node is linked to a node, and every node is linked to a parent node (except, of course, the lone root node such as "frame gun"). There's nothing scary about this anymore... all that can really go wrong is if you forget to link something to a parent, or if you scale a node. Don't ever scale your nodes, that's asking for trouble like you wouldn't believe. (Figure D1: If I know I'll have custom animations, I'll revise the node positions to be a bit more logical and add them where they're needed) And there you have it. To reiterate a few points: 3p: -Frame gun doesn't have to be at 0,0,0; however in 3p your model's main grip does --As the Flamethrower illustrates, the gun is in fact positioned with 0,0,0 representing the position + orientation of the grip hand -For a 3p model, if you're not sure what to do import an existing model's nodes + markers and adjust them as you see fit FP: -If you want to make a new model work with old FP animations you must use exactly the old one's node setup; do not move old nodes or create new ones. -Even if you're making custom animations, don't scale your nodes!!!!!!! -Make sure the key points of the geometry more or less line up; if they don't you should consider custom animations (or at the very least, editing existing ones). -Do whatever you want with markers. One super-final note: be sure you fp model has a flashlight marker!! Otherwise the flashlight will look strange!!! In the end, all it really is is linking geometry and markers to nodes if you want them to move. I'm done. Questions? Edited by teh lag on Jun 20, 2011 at 02:32 PM Uhhh... What he said ^^^^^ |
||||
|
|
|||||
|
ODX Joined: Jul 26, 2007
A rare sight, indeed. |
Posted: Jun 21, 2011 09:50 AM
Msg. 10 of 24
That was completely unnecessary, unquote him right now gosh damn it that scrolling was annoying as hell.
Also: don't be frightened by Teh Lag. He just put it into superb detail but the rigging of a weapon itself doesn't exactly take too long. Then again, it varies per weapon I'd say but overall it's not as painstaking a job as something like UVing. |
||||
|
|
|||||
|
teh lag Joined: May 6, 2008
|
Posted: Jun 21, 2011 11:16 AM
Msg. 11 of 24
If what I posted is too scary here is a cut-down version.
1) Make nodes for things that should move. Nodes are objects with "frame " at the start of their name. 2) All geometry and all markers must be linked to some node. The main grip (where the right hand would hold it) should be at 0,0,0 so the biped's arm will appear to grip it correctly. Ex: "frame gun", "frame magazine". 3) All nodes except for one (usually named "frame gun", which is like the root of the object) must be linked to another node (again, usually they are linked to frame gun). Ex: frame gun (root node) |-frame magazine (linked to frame gun) ..|-frame bullet (linked to frame magazine) |-frame ophandle (linked to frame gun) 4) For 3P models, use the gbxmodel importer to get the "ground point", "left hand cyborg" and "left hand marine" markers from an existing model because nobody likes positioning them on their own. Additionally, all weapon models (except maybe some weird ones) should have a "primary trigger" and/or "secondary trigger" marker to represent where the end of the gun barrel(s) are. "Primary ejection" and/or "secondary ejection" mark where spent casings should appear in many firing effects but obviously some weapons like the plasma rifle wouldn't need them. 5) It's a good idea to have collision models to go with the 3p weapon model. Just make a box to fit over the 3p model and delete the original geometry + markers. Link the box to the root frame, give it a generic material and you're good to go. 6) If you want to make a FP model work with existing FP animations, you must import the nodes of the model for which those animations were designed; you then move the new geometry to line up with the old geometry. You may not add or move those nodes as doing the former makes the model not work with the animations and doing the latter usually results in things moving incorrectly. Edited by teh lag on Jun 21, 2011 at 11:20 AM |
||||
|
|
|||||
|
Spartan314 Joined: Aug 21, 2010
Former biped rigger & FP animator |
Posted: Jun 29, 2011 03:21 AM
Msg. 12 of 24
So... I can't change 3P rig? I've moved mine heaps but it won't move.
The left hand cyborg node won't budge. I've moved it heaps and nothing happens to it... This is 3P.  |
||||
|
|
|||||
|
MMAMONSTERRR Joined: Jun 27, 2011 
|
Posted: Jun 29, 2011 05:11 AM
Msg. 13 of 24
Wow sexy shaders i see.
|
||||
|
|
|||||
|
Cheddars Joined: Oct 30, 2010 
Rave to the Grave. |
Posted: Jun 29, 2011 06:50 AM
Msg. 14 of 24
change the label in the weapon tag from hp to ar in the weapon section of the weapon tag
|
||||
|
|
|||||
|
The Cereal Killer Joined: Mar 18, 2011 
Scripts, AI, cutscenes, ui_widgets, animation. |
Posted: Jun 29, 2011 12:21 PM
Msg. 15 of 24
Quote: --- Original message by: IcePhoenix You just depleted my source of motivation. I am sure as hell NEVER gonna try rigging anything! Normal biped rigging is actually pretty straightforward. |
||||
|
|
|||||
|
Spartan314 Joined: Aug 21, 2010
Former biped rigger & FP animator |
Posted: Jul 1, 2011 04:58 PM
Msg. 16 of 24
  I think it's good enough for the DMR. But the Plasma Launcher is gonna keep being stubborn and the FP left hand won't move... |
||||
|
|
|||||
|
teh lag Joined: May 6, 2008
|
Posted: Jul 1, 2011 05:21 PM
Msg. 17 of 24
Quote: --- Original message by: spartan314 I think it's good enough for the DMR. But the Plasma Launcher is gonna keep being stubborn and the FP left hand won't move... What do you mean? I hope you're not trying to move the position of a hand in FP using the "#left hand cyborg" marker or similar (because that's not how that works: hand position in FP is determined by animations alone; hand markers have no effect). Edited by teh lag on Jul 1, 2011 at 05:22 PM |
||||
|
|
|||||
|
Wesker Joined: Jun 8, 2011 
Your Future Hinges upon This Fight!!! |
Posted: Jul 1, 2011 06:59 PM
Msg. 18 of 24
thats some nice slick sexy armor
|
||||
|
|
|||||
|
Spartan314 Joined: Aug 21, 2010
Former biped rigger & FP animator |
Posted: Jul 1, 2011 07:02 PM
Msg. 19 of 24
It's bourrin's armor.
Check him out! Oh yeah: Quote: --- Original message by: teh lag What do you mean? I hope you're not trying to move the position of a hand in FP using the "#left hand cyborg" marker or similar (because that's not how that works: hand position in FP is determined by animations alone; hand markers have no effect). Oh... that'll be why then... But then why would it have worked for the DMR? Edited by spartan314 on Jul 1, 2011 at 07:06 PM |
||||
|
|
|||||
|
TauSigmaNova Joined: Jan 31, 2011 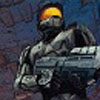
If love is blind, I guess I'll buy myself a cane |
Posted: Jul 2, 2011 01:06 AM
Msg. 20 of 24
-saving for lags tut-
|
||||
|
|
|||||
|
teh lag Joined: May 6, 2008
|
Posted: Jul 2, 2011 12:03 PM
Msg. 21 of 24
Quote: --- Original message by: spartan314 Oh... that'll be why then... But then why would it have worked for the DMR? Edited by spartan314 on Jul 1, 2011 at 07:06 PM Wait... FP means "first-person". Are you talking about first-person or third-person? In any case: I also will point out that the Cyborg's 3p plasmacannon animations (the one the FRG uses) do not use "left hand cyborg" to attach the left hand but rather just "left hand"; if you are indeed talking about the third-person view then I suggest being sure they you are using the correct marker name. Blame Gearbox for the inconsistency. |
||||
|
|
|||||
|
Spartan314 Joined: Aug 21, 2010
Former biped rigger & FP animator |
Posted: Jul 2, 2011 04:44 PM
Msg. 22 of 24
For FP, I moved the cyborg left hand node, and it worked. Not complaining though.
So for the plasma cannon I would need new animations? |
||||
|
|
|||||
|
teh lag Joined: May 6, 2008
|
Posted: Jul 2, 2011 06:34 PM
Msg. 23 of 24
Quote: --- Original message by: spartan314 So for the plasma cannon I would need new animations? What? No, just rename the marker in your 3p model. Quote: For FP, I moved the cyborg left hand node, and it worked. Not complaining though. What? "Node" or "marker"? I'd like to see this in action; I refuse to believe that you can alter the hand positioning of a gun in first-person by moving a marker. Edited by teh lag on Jul 2, 2011 at 06:37 PM |
||||
|
|
|||||
|
Wesker Joined: Jun 8, 2011
Your Future Hinges upon This Fight!!! |
Posted: Jul 2, 2011 06:50 PM
Msg. 24 of 24
yeah i saw the visor xD it just looks amazing in black
|
||||
|
|
|||||

|